
In simple terms, Multisite allows you to run multiple sites from one WordPress installation.
So what does this have to do with plugins? It turns out, quite a bit.
Within this tutorial, I’ll provide a brief history of Multisite, how it relates to WordPress plugins, and if you should make your plugin multisite compatible.
Table of Contents
- A brief history of Multisite
- Here comes Multisite to the rescue
- Let’s briefly dive into Multisite and its quirks
- Why people use Multisite and several Use-cases
- The differences between Multisite and a Single-site WordPress plugins
- A breather…
- Let’s start with the database structure
- Let’s dive into some code!
- And finally, some thoughts on plugin licensing
- Conclusion
A brief history of Multisite
In the beginning, WordPress started off as a single-site platform. It was simple really. You got a database, some plugins, themes, and users. That’s all a WordPress site used to be.

With a single-site install, all you had to worry about is keeping Core updated, as well as your plugins and themes.
There was only one issue. What do you do when you manage multiple WordPress sites?

Two sites are cumbersome. Now you have to worry about updates on multiple sites, and that can be time-consuming.
Now imagine you’re an agency with a ton of different WordPress installations…

Updating all of those sites separately was/is a huge time suck. This is still the case for some agencies.
From the frustration of maintaining sites came several plugins and services that would help you update all those sites at once. These services had their own quirks, which I will not go over here.
Here comes Multisite to the rescue
Pre-Multisite in Core, creating a Multisite was technically possible, but required a Ph.D. in hosting.
it was a hodgepodge of fixes and hacks, so therefore it was very advanced.
Multisite, also known as multi-user (or MU), was officially merged into WordPress at version 3.0.
You still had to maintain sites (I call these subsites), but you only had to maintain them typically in one place.
Just to note: automatic plugin updates weren’t introduced until 3.7. So between 3.0 and 3.7, Network Administrators had to update everything manually.
Multisite promised to alleviate the pain of multiple WordPress installs. You could now create sites on a whim and only had to update everything in one place.
Let’s briefly dive into Multisite and its quirks
When Multisite was merged into WordPress 3.0, setting up a network was still a pain, but immensely easier.

Terminology
Warning: this section is intentionally confusing.
Let’s break it down.
- Networks: a network of sites. Typically there’s only one network per Multisite install
- Network options: network-wide options similar to options you would get on a single-site installation
- Subsites or sites (also known as blogs): These are the sites within your network
- Main site: this is the site you use as the main (or default) site in your network
- Site admin: this is the admin/dashboard for a subsite
- Network admin: this is where you can manage the entire network
- Super Admins: also known as Network Administrators, these users can visit the Network Admin or any subsite on the network
For more terminology, please visit the Glossary link below.
The Network Admin
The cool thing about Multisite is you add and manage plugins and themes from an area known as the Network Admin. The downside? Managing plugins and themes for the “entire” network. If you have 500 sites, for example, you risk some, if not all, having critical errors if an update goes wrong.
Another pain point is when a plugin is not Multisite compatible and only has per-site settings. This results in site administrators or the Network Administrator (also known as a Super Admin) having to configure a plugin per site. Spread throughout many sites, a non-multisite compatible plugin, as good as it is, will not be an option for having on a Multisite install.

The same could be said for themes. Typically themes aren’t configurable in the Network Admin. You’ll have to set these up per-site (which can actually be a good thing).
Plugin and Theme licenses
If a plugin or theme license isn’t network-compatible, this means you’ll have to also set these up per subsite. If you have a limited license, these will count against your activation limit. Not exactly ideal.
Theme installations
One awesome Multisite feature is installing themes. You can choose which themes to activate for the network.
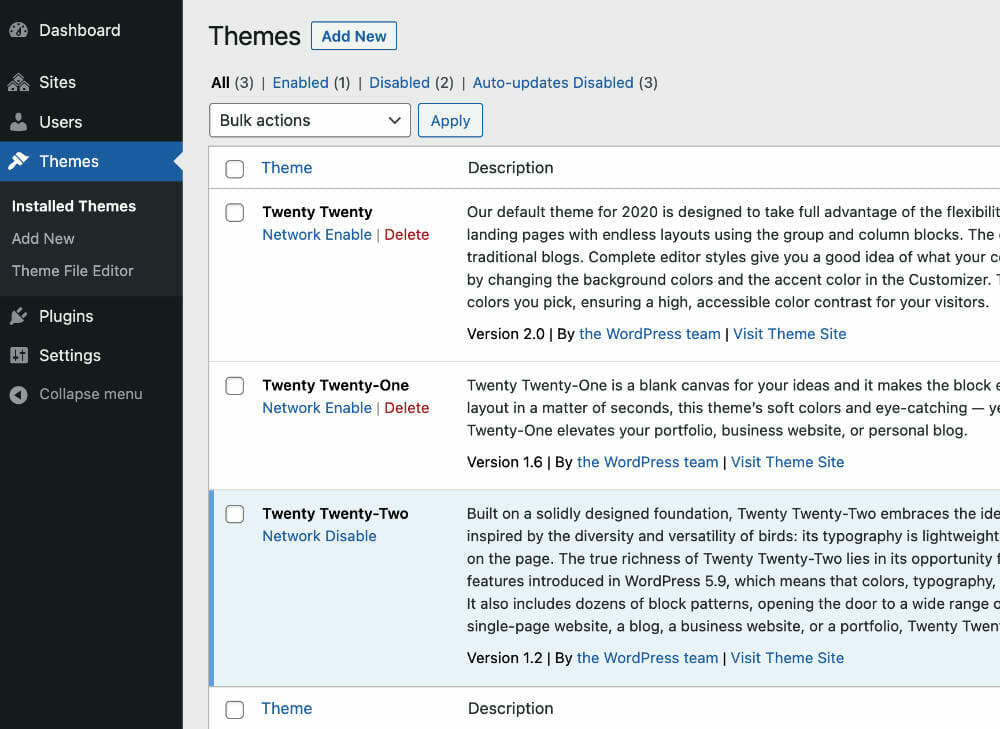
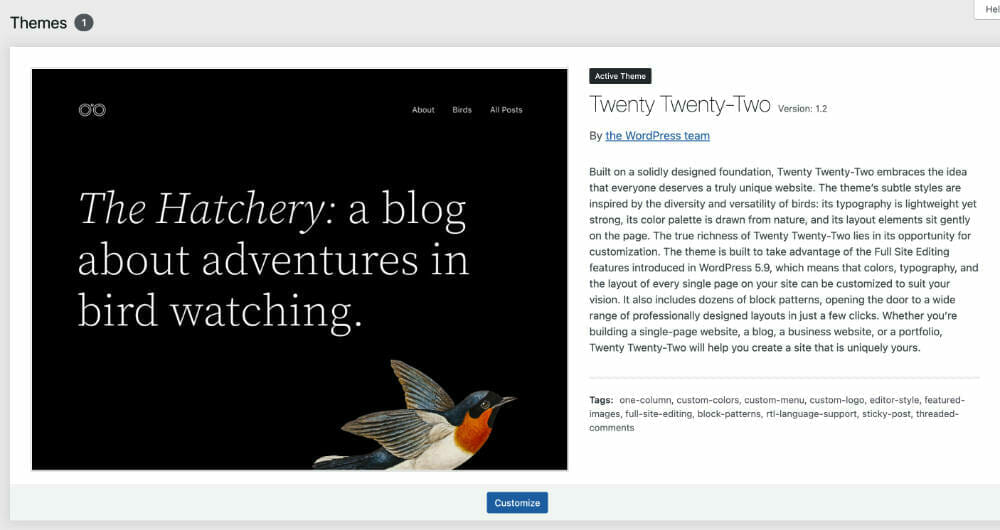
For the subsite, the site admin can only be able activate/deactivate the themes you choose. This will guarantee a single look and feel across the entire network.
Plugin installations
With Multisite, you can only install plugins from within the Network Admin.
A quirk in plugin installation is deletion. If “one” subsite is using it, you’ll have to go into that subsite and deactivate the plugin for each site that is using it. That being said, site admins can only activate or deactivate the plugin (but not delete).
Another benefit in regards to plugins is that you can “Network Activate” it. This forces all subsites to use that plugin. Site admins cannot deactivate a network-activated plugin.
Just be aware of the risk of plugin updates. One awry update can crash your network.
Backups
It is very difficult to backup Multisite. It’s also very difficult to export a subsite or even import a single-site install into Multisite.
Back when I worked at iThemes and helped develop a few releases of BackupBuddy, I wrote in Multisite-compatibility.
It’s been experimental ever since, but Multisite hasn’t changed much since then and I’ve “heard” it still works.
In general, I recommend either BackupBuddy (with its network feature on) or UpdraftPlus for backups on a Network.
Multisite quirks conclusion
If you are used to single-site installs, it will take a medium-to-advanced-level learning curve to get used to all the quirks that Multisite entails.
In other words, I don’t believe you can pick up Multisite knowledge without getting your hands dirty.
Why people use Multisite and several Use-cases
Multisite has many positive aspects for use. You can create a subdirectory Multisite, map each site to a unique domain, and even have subdomains for each site.
That being said, here are some common use-cases I’ve seen throughout the years.
Education sites
With multiple departments in education, you can easily spin up a new site for each department. This allows a separation of concerns and each department can inherit a base theme, or even have a totally different appearance.
Magazine sites
I’ve worked on magazine sites where each section has its own site and a unified theme. If you’re struggling with a lot of sections and post types for a magazine client, Multisite is a good solution.
Intranets
A bit similar to Confluence, you can have various buckets of information organized by site. This can be used for internal blogs, documentation, galleries, wikis, and even allowing different departments the ability to customize their own “site.”
Maintenance
Since there is only one WordPress install, a network admin can update plugins and themes for the entire network in just one place.
You can even have multiple clients on one WordPress install and have a curated and unique domain for each one.
Multi-lingual sites
With Multisite, you can have one site per language. While this is tricky, there are several multi-lingual plugins out there that can help with this use-case.
Enterprise
Most enterprise sites I’ve seen have multisite enabled, even just for one site. I’ve seen this on WordPress VIP sites.
In this case, multisite allows the client to have admin access to their site while allowing a Network Administrator to lock down certain aspects of the site (e.g., adding new plugins, themes, and users). A single-site installation doesn’t have this functionality unless you want to deal with role management.
Enabling Multisite provides an extra layer of protection for both the client and network admin.
Now let’s dive into how Multisite is different for plugins on a network vs Single-site installations.
The differences between Multisite and a Single-site WordPress plugins
In this section, I will go over the main difference that plugin authors should take into account when it comes to Multisite.
Let’s go over the main differences between Multisite and single-site installs when it comes to WordPress plugins.
Admins vs Network Administrators (i.e., Super Admins)
When you’re on a single-site, admins control everything. And since roles beneath admin are typically limited, I’ve seen installs with over a dozen+ total administrators (not at all ideal).
With Multisite, you have a Network Admin (i.e., Network Dashboard) where you can control all of the subsites.
The Network Administrator (i.e., Super Admin) is one layer above site admins. It doesn’t matter how many admins manage their sites. You control the entire installation, as well as the individual subsites.
For example, let’s look at plugins on Multisite.
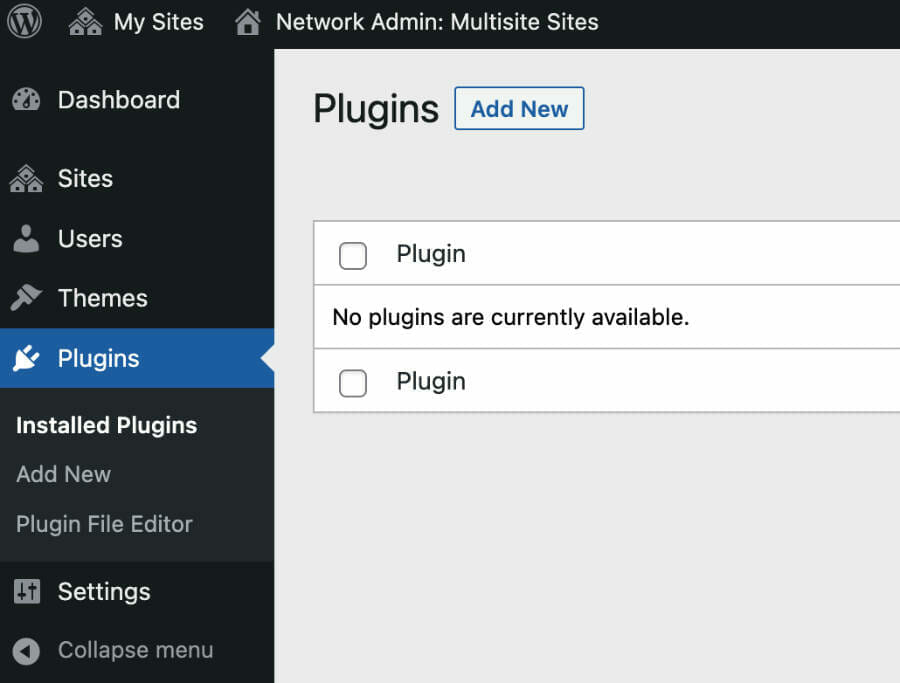
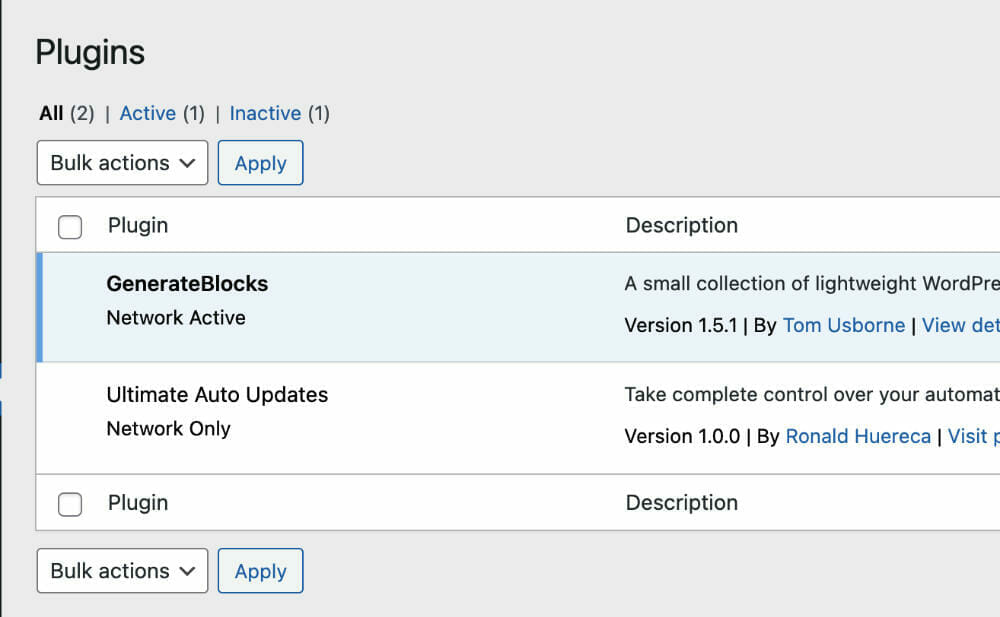
With Multisite, you can only add and delete plugins. In the next screenshot, I will show what a Network Admin sees vs an admin on their site.

When a plugin is added via the Network Dashboard, the Network Administrator (i.e., Super Admin) can Network Activate the plugin (i.e., activate the plugin on all sites). The Network Admin can also delete the plugin with one caveat: the plugin must be disabled on all sub-sites.
WebDevStudios has a nice helper class for determining which plugins are enabled on subsites.
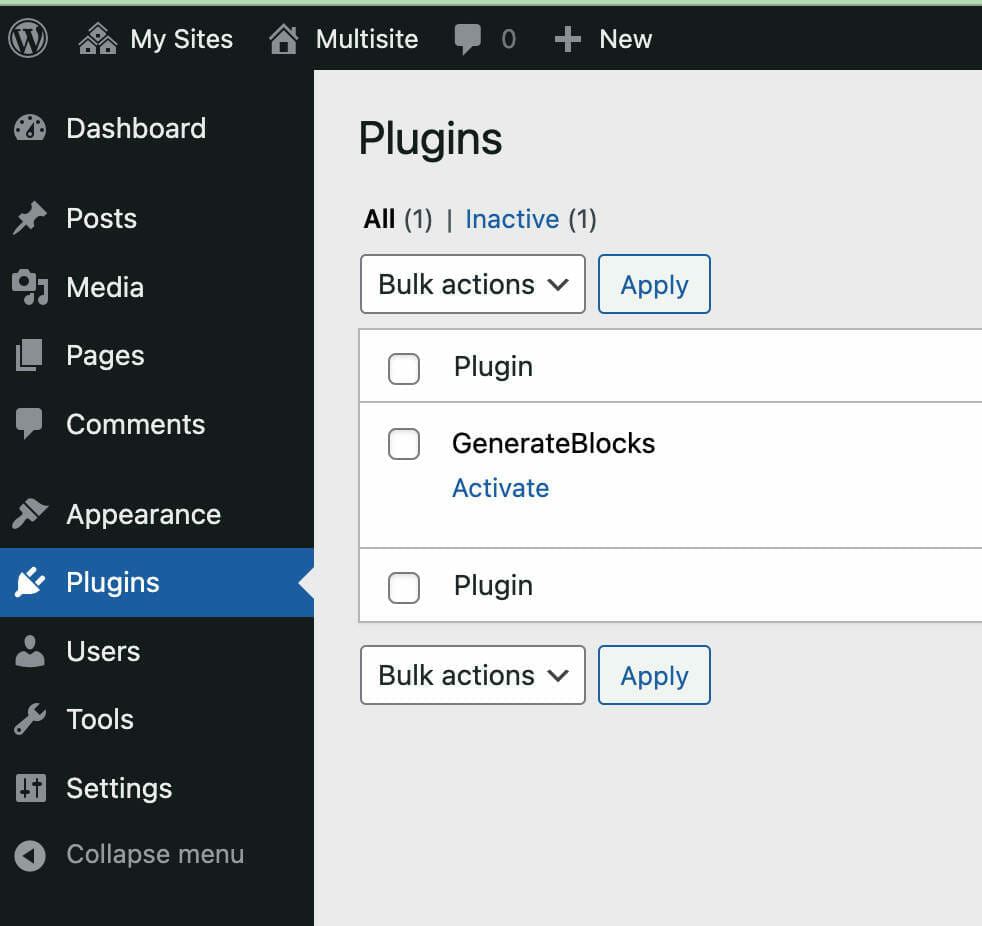
The site admin will now see the plugin on their plugin’s screen and can only activate and deactivate the plugin (but not delete the plugin).
With single-site, you can add, deactivate, and delete plugins and themes as often as you desire.
With multisite, a site admin cannot add or delete any plugins. Likewise for themes.
Let’s take a look at a plugin that is network-activated and what that looks like in the Network Dashboard.

And lastly, this is what the site admin sees when a plugin is network-activated.
Plugin Settings
With plugins on single-sites, WordPress plugins can tap into many, many locations to have their plugin settings. On top of that, you can use the settings API.
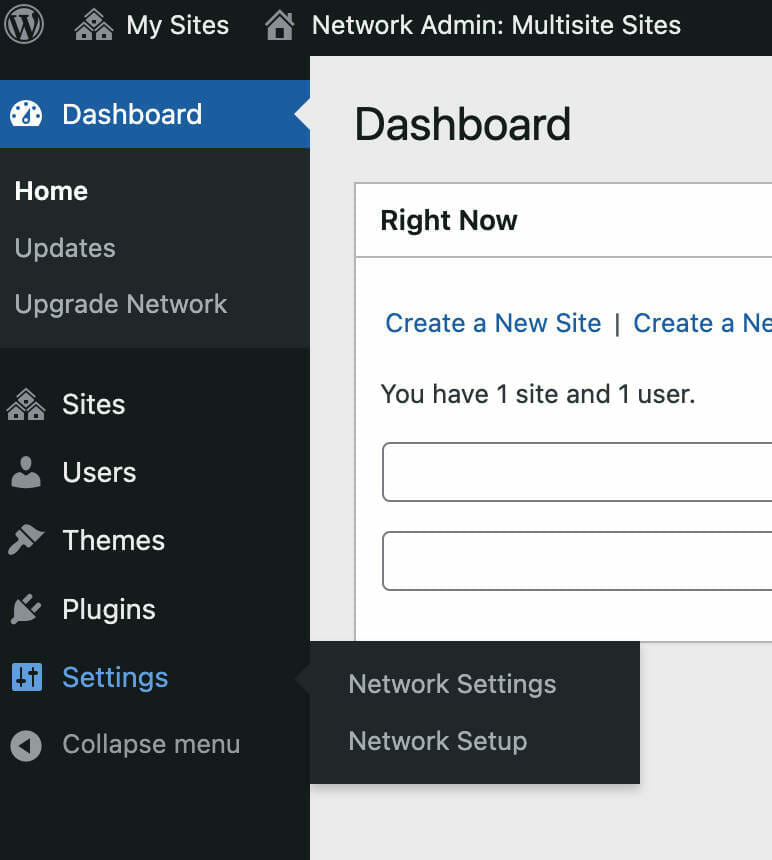
Within the Network Admin, you typically have one logical choice to place your plugin: in the Settings menu item.
A breather…

Take a break. This article is long. If you’ve decided that Multisite is for you, you can come back to this tutorial and use the Table of Contents to get back to where you left off.
Let’s start with the database structure
I always advise new developers to understand the data structure of the database. Once you know where everything is, you can then begin to start pulling and pushing options.
For WordPress, let’s look at the differences between single-site and Multisite. I’ll go over the important ones.
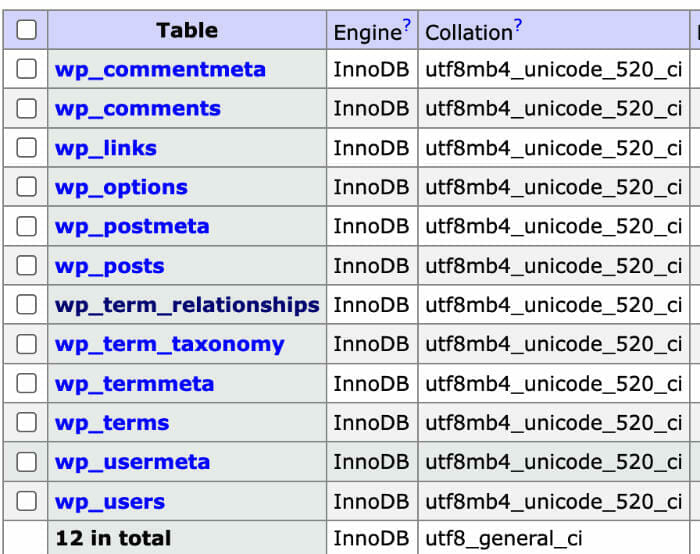
If you develop for WordPress, these are the standard database tables.
But when you enable Multisite, you get a few extra tables.

Furthermore, if you create a new site, the database becomes more convoluted. Let’s go over the important tables.
wp_site: a table with all your networks

The wp_site table, which should really have been named wp_networks, stores all reference to your networks. You’ll typically only see one item in here as multi-networks are quite rare.
wp_blogs: a table with all your sites
Each blog (ahem, site) is given a different ID. It’s the database way of telling all the sites apart. The IDs start at 1 for the main site, and 2, 3, 4 and so on for subsites. In the example below, you have a reference to the main site on the network as well as any subsites.
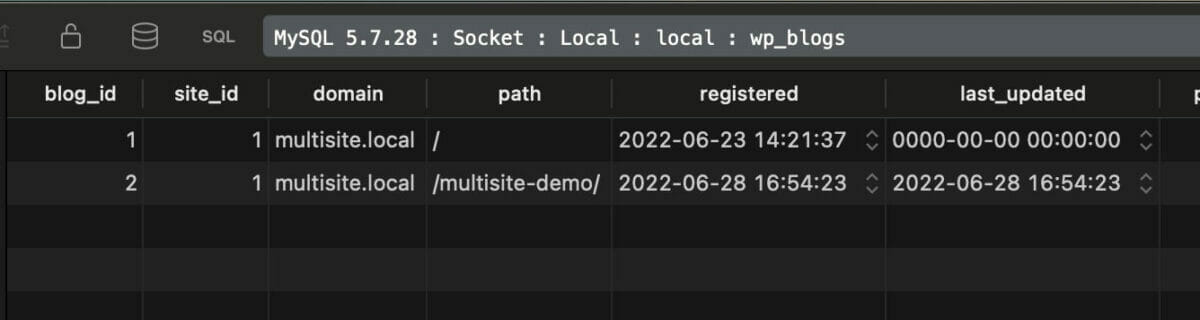
When you go to Sites in the Network Admin, you are seeing a visual representation of wp_blogs.

wp_sitemeta – an options table for all your sites
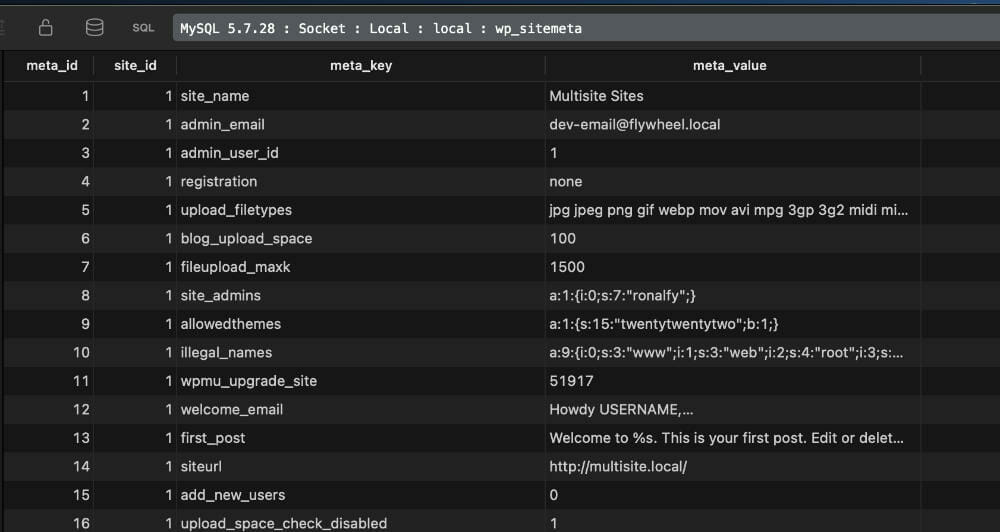
wp_sitemeta Table StructureIf you’ve ever messed with WordPress options, you’re probably familiar with the options above; wp_sitemeta is just a network-wide options table.
To retrieve options from this table, you will use get_site_option. Please note that in a single-site installation, you can use get_site_option to also get regular options.
Eerily familiar is the function signature of get_option.
To save options for a network, you would use update_site_option.
The update_site_option function will update an option for the entire network. You can replace update_site_option with update_option quite easily.
wp_users/wp_usermeta – has all the users on the network
This is the same structure used on single-site installs.

The biggest difference is that this is a network-wide database table of all of the users on your network.
You can also use the wp_usermeta table to set network-wide options for a particular user.
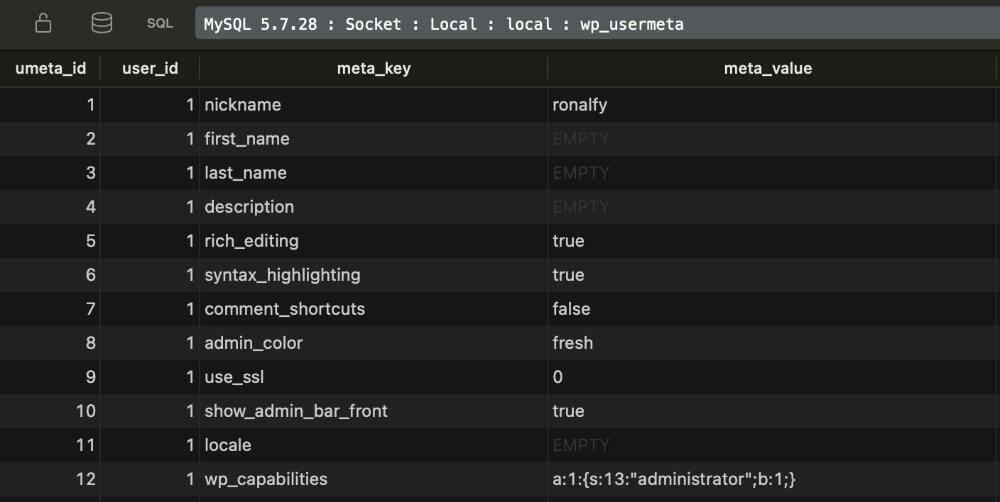
Finally, in wp_usermeta, the sites that are enabled for the user are set in user meta.
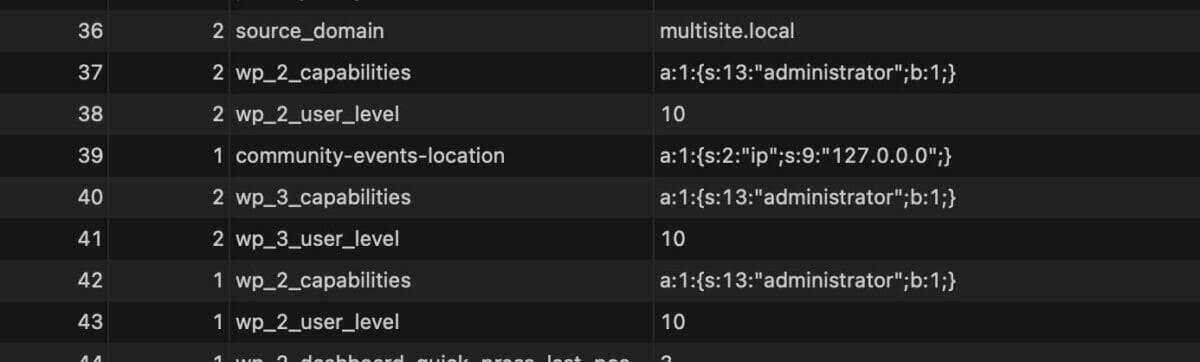
I’ll go over the user and user meta retrieval in a section below.
Additional site tables
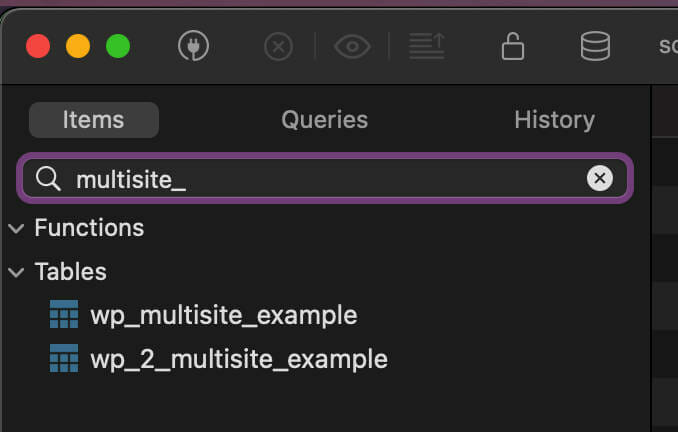
When you create a new site on the network, select WordPress tables are created with a format of: {prefix}{blog_id}{tablename}.
In the below screenshot, the prefix is wp_.
This is followed by the tablename. So an example is wp_2_comments.
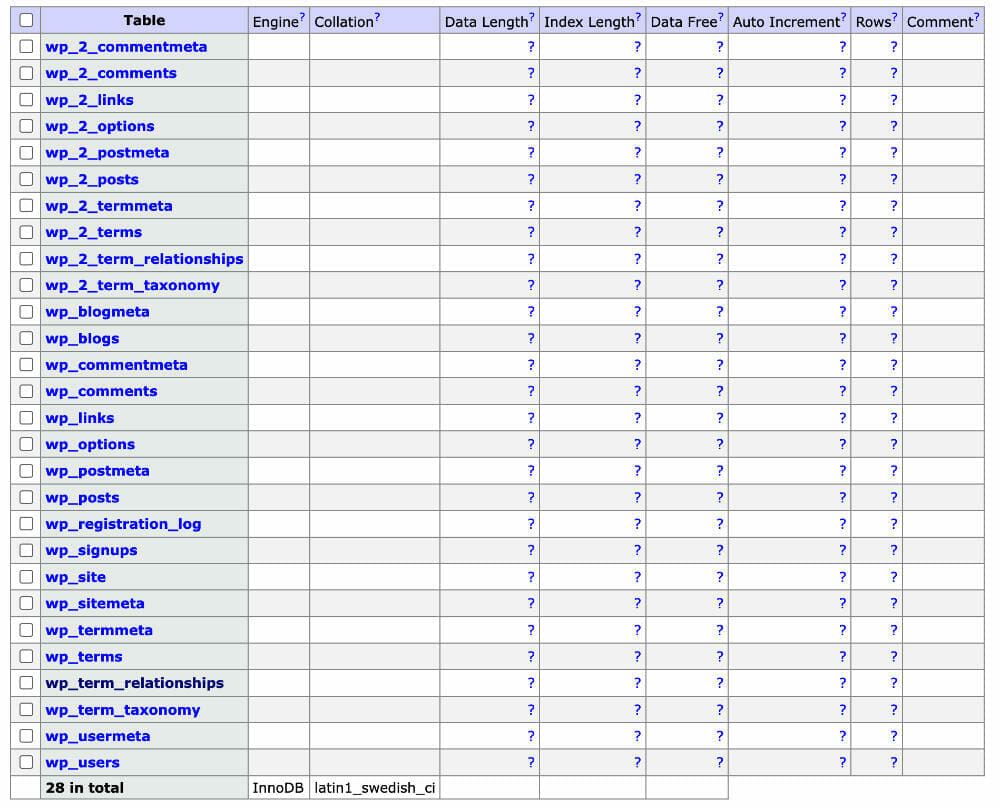
You’ll notice that there is a “2” after the default prefix wp_. For example, wp_2_options.
But you’ll also notice that some of the tables don’t include the wp_2_ prefix. These are what I refer to as “core” or global tables.
New sites have their own prefixed options table, posts table, comments table… What this means is that each prefixed table is essentially a contained bucket that doesn’t affect the main site.
If you were to add a third site, you would see the wp_3_ prefix.
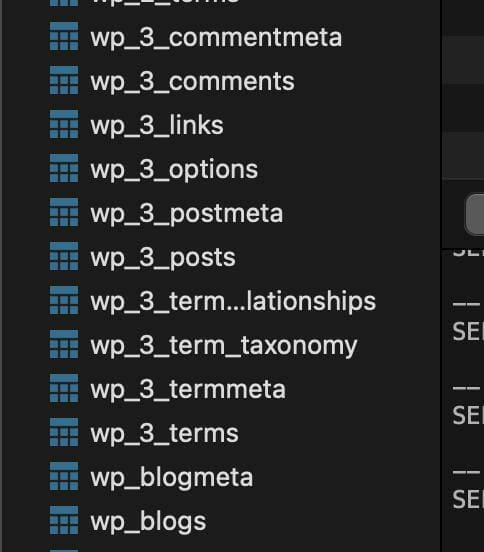
As you add multiple sites, your prefix will increment. If you have many sites, this makes tools like PHPMyAdmin fairly useless as there will be a trove to sift through. I highly recommend TablePlus to navigate your database.
Database Tables/Overview Conclusion
I briefly went over the important database tables for Multisite.
Now that you know how everything is stored, let’s jump into some code.
Let’s dive into some code!
Within this section, I will go over common functions (recipes) that you can use to make your plugin Multisite compatible. I will mostly be picking on some of my own plugins to demonstrate some of the code differences. I’ll also sprinkle in some helpful core functions.
You can download an example plugin that has most of the functionality listed here.
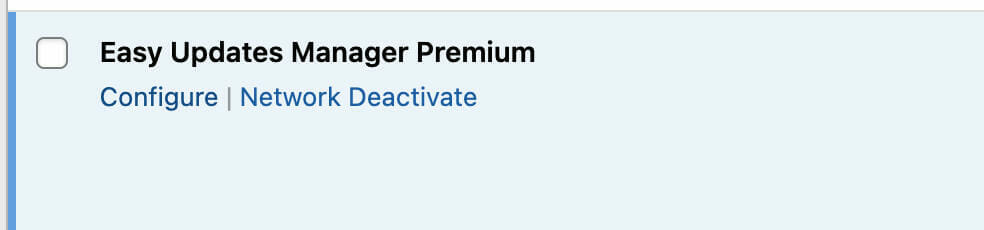
Network-only Plugins

If you have a plugin with global tables or functionality that needs to be on every site, you can set Network: true in your plugin header.
What this will do is to make sure that the plugin can only be Network Activated on a Multisite install. Here’s a screenshot below of what a user on a subsite will see if a plugin is network-only.
Check for Multisite (Recipe)
The following snippet (assuming it’s in the main plugin file) will let you know if your plugin is active on a Multisite install. You can see this in use in the example Multisite plugin.
/**
 * Checks if the plugin is on a multisite install.
 *
 * @since 1.0.0
 *
 * @param bool $network_admin Check if in network admin.
 *
 * @return true if multisite, false if not.
 */
public static function is_multisite( $network_admin = false ) {
	if ( ! function_exists( 'is_plugin_active_for_network' ) ) {
		require_once ABSPATH . '/wp-admin/includes/plugin.php';
	}
	$is_network_admin = false;
	if ( $network_admin ) {
		if ( is_network_admin() ) {
			if ( is_multisite() && is_plugin_active_for_network( plugin_basename( __FILE__ ) ) ) {
				return true;
			}
		} else {
			return false;
		}
	}
	if ( is_multisite() && is_plugin_active_for_network( plugin_basename( __FILE__ ) ) ) {
		return true;
	}
	return false;
}Code language: PHP (php)
This is how you would use it with a helper method to determine a plugin’s active or network active state. I will assume this method/function is in place for some of the later examples.
/**
 * Checks to see if an asset is activated or not.
 *
 * @since 1.0.0
 *
 * @param string $path Path to the asset.
 * @param string $type Type to check if it is activated or not.
 *
 * @return bool true if activated, false if not.
 */
public static function is_activated( $path, $type = 'plugin' ) {

	// Gets all active plugins on the current site.
	$active_plugins = self::is_multisite() ? get_site_option( 'active_sitewide_plugins' ) : get_option( 'active_plugins', array() );
	if ( in_array( $path, $active_plugins, true ) ) {
		return true;
	}
	return false;
}
Code language: PHP (php)
The highlighted portion of the code snippet assumes you have the previous static method in your main plugin file.
The difference between site_url and get_site_url
Using site_url vs get_site_url shows little difference between the two.
On single-site, you should expect:
site_url: http://singlesite.local

get_site_url: http://singlesite.localCode language: plaintext (plaintext)
Here’s what you’d get if the same was outputted for the main site on the network.
site_url: http://multisite.local

get_site_url: http://multisite.localCode language: plaintext (plaintext)
Pretty much the same, right? But with get_site_url, you can get the path of the network by passing it a blog ID (site ID).
Here’s an example of passing a blog ID (site ID) to get_site_url.
/**
 * Hook into content filter and display site links.
 *
 * @param string $content Post content.
 *
 * @return string Modified $content.
 */
public static function site_vs_home_url( $content ) {
	ob_start();
	?>
	<p>Site URL: <?php echo esc_url( site_url() );?></p>
	<p>Get Site URL: <?php echo esc_url( get_site_url( 1 ) );?></p>
	<?php
	return $content . ob_get_clean();
}Code language: PHP (php)
And here is the result:
site_url: http://multisite.local/multisite-demo

get_site_url: http://multisite.localCode language: plaintext (plaintext)
Since I passed the ID of the main site (i.e., 1), get_site_url will return the path to the main site while site_url will return the path to the site you’re currently on.
Plugin Action Links (Recipe)
Plugin action links are a great way to link to your admin settings screen, link to any documentation, and even upsell your products. You can also see this in use in our example plugin.
Here’s an example screenshot from my plugin Highlight and Share.

And here’s what it would look like on the network plugin’s screen.
For setting up action for a plugin that can both be activated on a subsite or network-activated, the following recipe will help do the trick.
This assumes you have a static class structure and have the is_multisite static method available.
/**
 * Add setting links
 */
public static function init_plugin_setting_links() {
	if ( self::is_multisite() ) {
		add_filter( 'network_admin_plugin_action_links_' . plugin_basename( __FILE__ ), array( static::class, 'add_plugin_actions_links_multisite' ), 5 );
	} else {
		add_filter( 'plugin_action_links_' . plugin_basename( __FILE__ ), array( static::class, 'add_plugin_actions_links' ), 5 );
	}
}

/**
 * Add plugin actions to the Network Admin plugins screen.
 *
 * @param array $links Array of setting actions.
 *
 * @return array $links Updated array of setting actions.
 */
public static function add_plugin_actions_links_multisite( $links ) {
	// Assumes you are placing the admin menu under the Multisite settings menu item.
	$admin_uri = add_query_arg( array( 'page' => 'your-plugin-slug' ), network_admin_url( 'settings.php' ) );
	array_push( $links, sprintf( '<a href="%s">%s</a>', esc_url( $admin_uri ), esc_html__( 'Settings', 'your-plugin-slug' ) ) );
	return $links;
}

/**
 * Add plugin actions to single-site or subsite plugin's screen.
 *
 * @param array $links Array of setting actions.
 *
 * @return array $links Updated array of setting actions.
 */
public static function add_plugin_actions_links( $links ) {
	// Assume plugin is on single-site or a subsite.
	// Assumes settings screen is under Settings Options General on a single-site.
	$admin_uri = add_query_arg( array( 'page' => 'your-plugin-slug' ), admin_url( 'options-general.php' ) );
	array_push( $links, sprintf( '<a href="%s">%s</a>', esc_url( $admin_uri ), esc_html__( 'Settings', 'your-plugin-slug' ) ) );
	return $links;
}Code language: PHP (php)
home_url vs get_home_url
Just as in the get_site_url section, the main difference is that get_home_url can take a blog ID as a parameter.
Once you pass the ID to the main site into get_home_url, you can expect this output:
site_url: http://multisite.local/multisite-demo

get_site_url: http://multisite.local

home_url: http://multisite.local/multisite-demo

get_home_url: http://multisite.localCode language: plaintext (plaintext)
And here’s the code I used:
/**
 * Hook into content filter and display site links.
 *
 * @param string $content Post content.
 *
 * @return string Modified $content.
 */
public static function home_vs_get_home( $content ) {
	ob_start();
	?>
	<p>home_url: <?php echo esc_url( home_url() ); ?></p>
	<p>get_home_url: <?php echo esc_url( get_home_url( 1 ) ); ?></p>
	<?php
	return $content . ob_get_clean();
}Code language: PHP (php)
Admin panel settings (Recipe)
If you choose to have an admin settings panel, just keep in mind that your plugin could be network activated.
In the next code snippet, I use the same settings code for both the subsite and also in the Network Admin.
public static function settings_init() {
	if ( Functions::is_multisite() ) {
		add_action( 'network_admin_menu', 'DLX_Multisite_Examples::register_admin_menu' );
	} else {

		add_action( 'admin_menu', 'DLX_Multisite_Examples::register_admin_menu' );
	}
}Code language: PHP (php)
The biggest difference here is I am using two actions to point to the same callback.
Here are the actions I take to ensure a smooth experience of subsite and Network Admin settings.
- admin_menu – This is to have your options on a subsite and not network wide
- network_admin_menu – This is to have your options stored globally
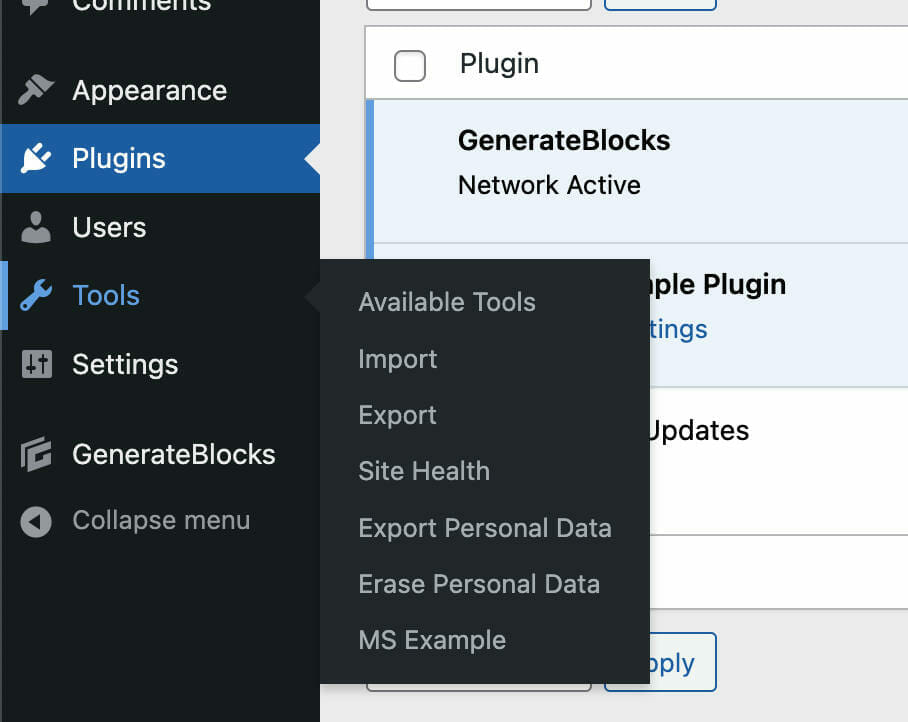
Finally, in callback register_admin_menu, we can add an options panel. This one is going in the Tools top-level menu item. On Multisite, it would be under the settings menu if Network Activated.
/**
 * Initialize the sub menu.
 */
public static function register_admin_menu() {
	$pagename = self::is_multisite() ? 'settings.php' : 'tools.php';
	$capabilities =  self::is_multisite() ? 'manage_network' : 'manage_options';

	add_submenu_page(
		$pagename,
		'Multisite Example Plugin',
		'MS Example',
		$capabilities,
		'multisite-example-plugin',
		'DLX_Multisite_Examples::settings_page'
	);
}Code language: PHP (php)
And finally there’s the callback itself.
public static function settings_page() {
?>
<div class="wrap">Hi, I am an admin placeholder.</div>
<?php
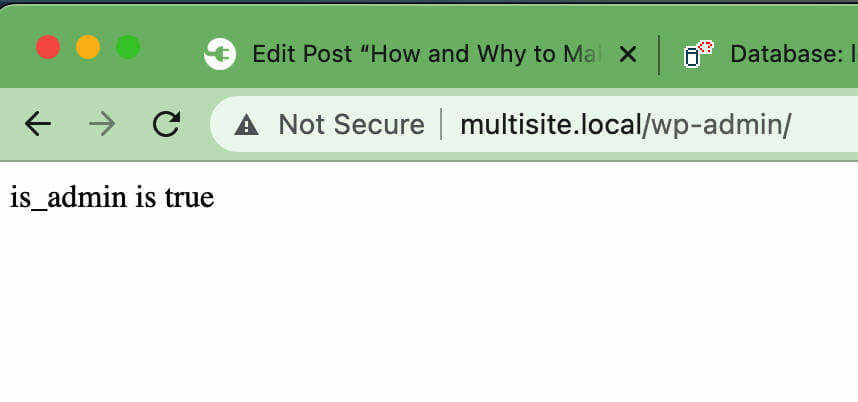
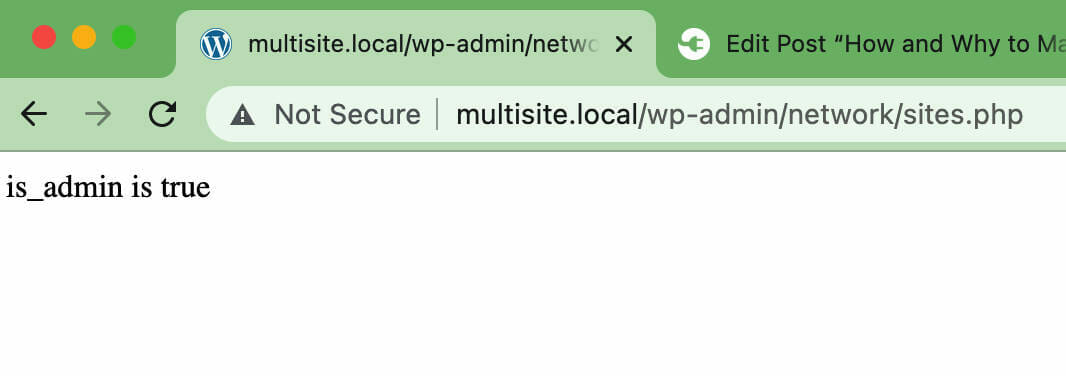
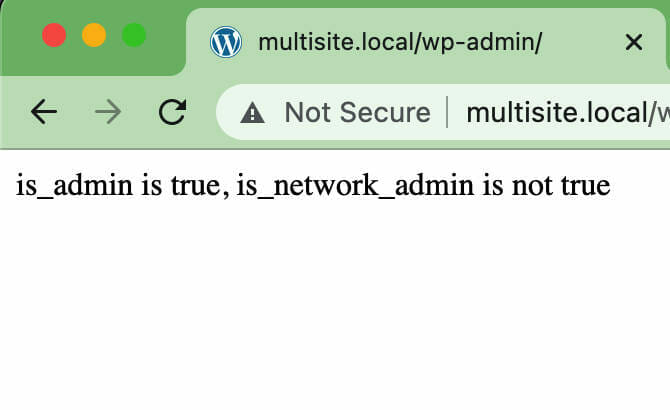
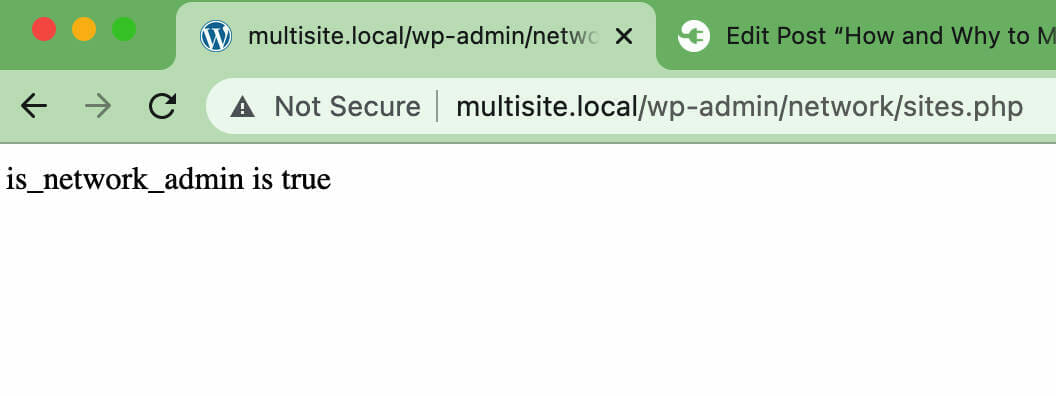
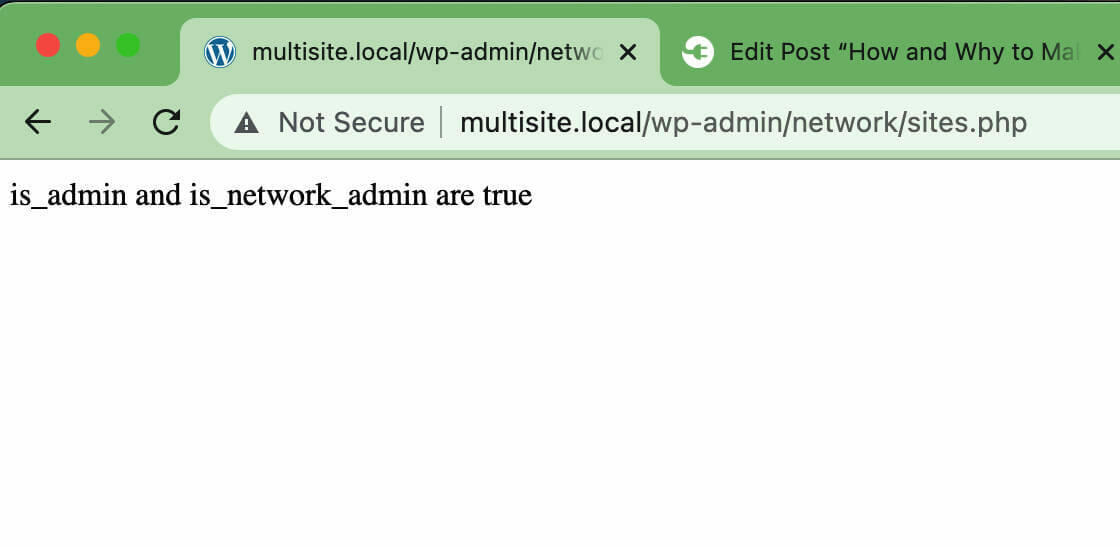
}Code language: PHP (php)The difference between is_admin and is_network_admin
The conditional is_admin is generally used to determine if a user is in the site admin or subsite admin.
In a subsite dashboard, we can expect is_admin to be true, and is_network_admin to be false. In the Network Admin, is_admin will still return true, and is_network_admin will also be true. So in general, you should check for both.
WPDB and creating custom tables (Recipe)
Here is an example of something I have out in the wild. While it isn’t ideal, it will demonstrate the main differences when creating a database table for your plugin on a network.
First, most plugins I’ve seen a version number of the table as a constant:
define( 'DLX_MULTISITE_EXAMPLES', '1.0.0' );Code language: PHP (php)And hooking into the plugins_loaded action, we can begin creating our table for a subsite.
/**
 * Create our database table.
 */
public static function create_table_subsites() {
	global $wpdb;
	$tablename = $wpdb->prefix . 'multisite_example';

	$version = get_option( 'multisite_example_table_version', '0' );
	if ( version_compare( $version, DLX_MULTISITE_EXAMPLES_TABLE_VERSION ) < 0 ) {
		$charset_collate = '';
		if ( ! empty( $wpdb->charset ) ) {
			$charset_collate = "DEFAULT CHARACTER SET $wpdb->charset";
		}
		if ( ! empty( $wpdb->collate ) ) {
			$charset_collate .= " COLLATE $wpdb->collate";
		}
		$sql = "CREATE TABLE {$tablename} (
						id BIGINT(20) NOT NULL AUTO_INCREMENT,
						user_id BIGINT(20) NOT NULL DEFAULT 0,
						slug text NOT NULL,
						label text NOT NULL,
						icon text NOT NULL,
						url text NOT NULL,
						date DATETIME NOT NULL,
						item_order BIGINT(20) NOT NULL DEFAULT 0,
						PRIMARY KEY  (id)
						) {$charset_collate};";
		require_once ABSPATH . 'wp-admin/includes/upgrade.php';
		dbDelta( $sql );

		update_option( 'multisite_example_table_version', DLX_MULTISITE_EXAMPLES_TABLE_VERSION );
	}
}
Code language: PHP (php)
I’ve highlighted the important bits as far as wpdb goes. This snippet would create a new database table for each subsite.
If your plugin is only designed to work on a subsite, you have to keep in mind this will create a new database table for each subsite.
If you would like to have just one table for the entire network, you’ll have to modify the prefix you’re using.
/**
 * Create our database table.
 */
public static function create_table_network() {
	global $wpdb;
	$tablename = $wpdb->base_prefix . 'multisite_example_network';

	$version = get_site_option( 'multisite_example_table_version', '0' );
	if ( version_compare( $version, DLX_MULTISITE_EXAMPLES_TABLE_VERSION ) < 0 ) {
		$charset_collate = '';
		if ( ! empty( $wpdb->charset ) ) {
			$charset_collate = "DEFAULT CHARACTER SET $wpdb->charset";
		}
		if ( ! empty( $wpdb->collate ) ) {
			$charset_collate .= " COLLATE $wpdb->collate";
		}
		$sql = "CREATE TABLE {$tablename} (
						id BIGINT(20) NOT NULL AUTO_INCREMENT,
						user_id BIGINT(20) NOT NULL DEFAULT 0,
						slug text NOT NULL,
						label text NOT NULL,
						icon text NOT NULL,
						url text NOT NULL,
						date DATETIME NOT NULL,
						item_order BIGINT(20) NOT NULL DEFAULT 0,
						PRIMARY KEY  (id)
						) {$charset_collate};";
		require_once ABSPATH . 'wp-admin/includes/upgrade.php';
		dbDelta( $sql );

		update_site_option( 'multisite_example_table_version', DLX_MULTISITE_EXAMPLES_TABLE_VERSION );
	}
}
Code language: PHP (php)
I’ve highlighted the main variations of creating a network-wide table.

The main difference is that instead of using $wpdb->prefix, we’ll be using $wpdb->base_prefix.
In multisite, $wpdb->prefix will use the current prefix of the site. So for example, if you are on site 2, the prefix would be: wp_2_
To retrieve the “base” prefix (i.e., wp_), you would use $wpdb->base_prefix instead.
The difference between get_option and get_site_option
On a single-site installation, you can get away with using get_site_option instead of get_option. They both do the same thing (at least on single-site).
With Multisite, each “blog” has their own options table. So if you use get_option, you’ll only be retrieving the options from the subsite.
When using get_site_option, however, you’ll be querying the sitemeta table that is network-wide.
You’d apply the above logic to get_transient and get_site_transient as well.
The difference between update_option and update_site_option
Using update_option on a network will only update the options table on the subsite.
When using update_site_option, the options will be saved in the sitemeta table, and therefore will be global (network-wide).
If you’re coding a Multisite-compatible plugin, you can get away with using update_site_option if you’d like to have these options globally on a network.
The above logic also applies to set_transient and set_site_transient.
Switching Sites Programmatically
A handy function to know is switch_to_blog.
If you must, and I emphasize must, get options from another site, then switch_to_blog will help you. But it is an EXPENSIVE function, because it essentially has to initialize a subsite. So please use this sparingly, but know it’s an option.
Diving Into Code Conclusion
I shared a bunch of Multisite-related code with some differences between functions that can be used on single-sites, subsites, and your network. If you’d like to see code, I have an example plugin with most of these examples on GitHub.
And finally, some thoughts on plugin licensing
There are some schools of thought when considering licensing for your premium plugin:
- A license needed for each subsite
- A license needed for the main site, but not subsites
- A license needed for the network
Subsite licenses
Most licenses for premium software have an activation limit. If you choose this path, there will be a unique admin area for each subsite. And since subsites are technically sites, each license activation will decrement your allowed activations.
If you need to enforce activations and have options per subsite, this is likely the way to go.
Licenses and options for the main site only
Rather than code an admin that has to be configured per subsite, you can simply target the main installation (which has a site ID of 1).
The options would be configured on the main site, but stored network wide. This can save you from coding one admin settings area for both the subsites and Network Admin.
Licenses only have to be entered once, and will only count as one activation.
Network-wide licenses
In this particular case, you have an admin settings area in the Network Admin. You can still code out specific admin settings for subsites (or even the main site), but the license area is on the Network Admin side.
As in Main Site licenses, you only have to enter the license once and will only count as one activation.
Which should I choose?
The majority of licenses out there are per site (as in per subsite). Since Multisite network sites can number in the thousands, having one license per network may unreasonably increase your support queue.
On the other hand, if you want to please a Network Administrator, you’d have a Network-wide option or even have a Multisite plan that can be purchased.
Lastly, if you want your plugin to work on enterprise sites, you should have a network-wide license.
Conclusion
In this (very long) article, I went over the history of Multisite, the differences between single-site installations and Multisite, Multisite quirks, and I also shared some code.
If you have any questions, please leave a comment, or give me a shout.

Ronald Huereca founded DLX Plugins in 2022 with the goal of providing deluxe plugins available for download. Find out more about DLX Plugins, check out some tutorials, and check out our plugins.