
The WordPress admin bar can be a useful place to have shortcuts to the various sections or actions of your WordPress plugin. In this tutorial, I’ll show you how to add your own admin bar menu item and show you some various use cases for creating your own menu item. For completeness, I’ll also show you some cool tricks you can do with the admin bar.
Should you add a custom admin bar menu to your plugin?
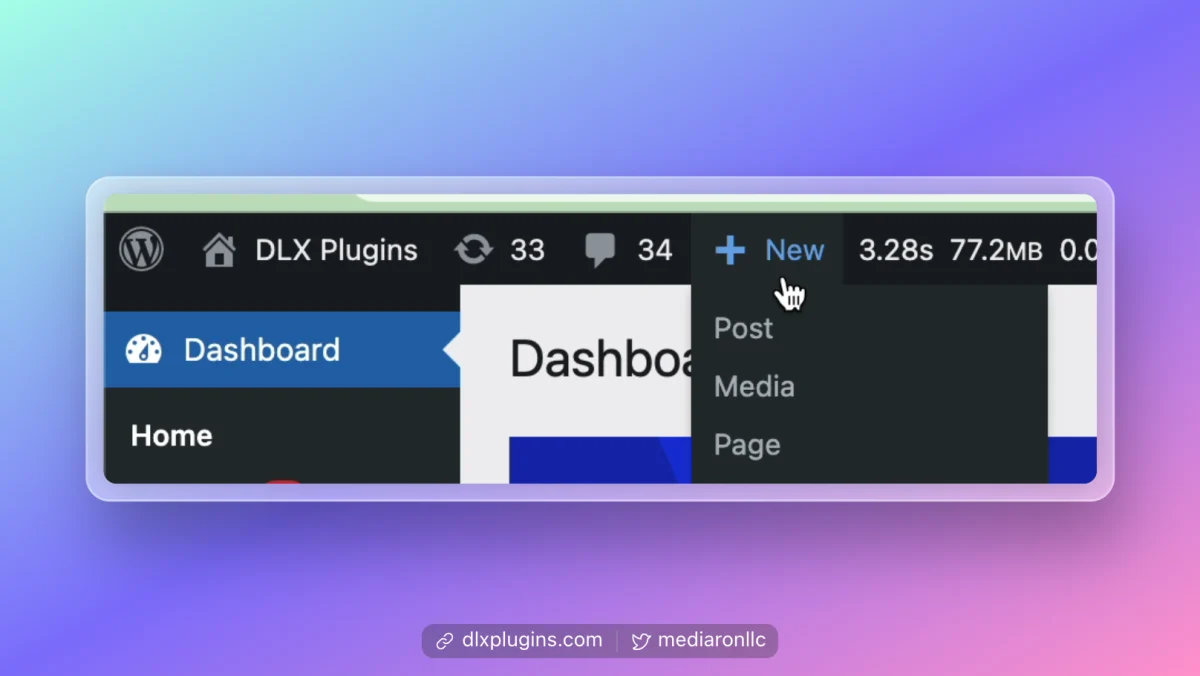
Providing users with an easy-to-use interface and positive user experience is critical for any plugin developer. The admin bar is a prominent location in the WordPress admin, allowing quick access to a variety of options. For example, you can create new posts directly from the admin bar.
If your plugin has settings that are commonly used, perhaps you should consider adding a custom menu to the admin bar. You can save users some steps or from having to dig through various admin setting options.

Admin bar pros
Here are some pros for creating an admin bar item.
- Accessibility and discovery: a custom menu in the admin bar can provide quick and easy access to frequently used features of your plugin.
- Branding: a custom menu is great for branding and providing extra visibility to your installed plugin.
- Customization: you can choose which of your plugin’s features and shortcuts to highlight and can tailor the menu dynamically based on a user’s settings.
Admin bar cons
There are some drawbacks to adding a menu to the admin bar.
- Clutter: the admin bar is only so large, and depending on the plugins installed, the admin bar could be a mess if many plugins add their own menus.
- Confusion: not all admin bar menus make their purpose clear and might actually confuse users further on how to use your plugin.
- Fallout: you will have some unhappy users who simply hate the idea of your plugin adding an admin bar menu.
Or, as one Twitter user so eloquently put it:
When adding a custom menu, you’ll need to keep the end user’s needs in mind. After all, it is their dashboard that is being affected when choosing to add the menu.
Tip: Add a way to disable the admin menu item
If you do choose to have a top-level admin bar item, I recommend having an option or filter to disable it.
While the opinion of whether or not to add something to the admin bar is subjective and depends on the scenario, try to make the admin bar useful for the end user.

Ultimately, the decision to add an admin bar item is up to you.
How to add a a top-level menu to the admin bar
Let’s start with the basics. We’ll need to add an action for admin_bar_menu. Here’s how it would look.
<?php

/**
 * Add a new admin bar menu item.
 *
 * @param WP_Admin_Bar $admin_bar Admin bar reference.
 */
function my_plugin_add_admin_bar_items( $admin_bar ) {
	// Run admin bar code here.
}
add_action( 'admin_bar_menu', 'my_plugin_add_admin_bar_items', 50 );Code language: PHP (php)
From there, we can call methods on the $admin_bar object in order to add the items.
The admin bar can be shown on the frontend and backend
When adding items without an is_admin check, your menu item will show up in the admin and also on the frontend.
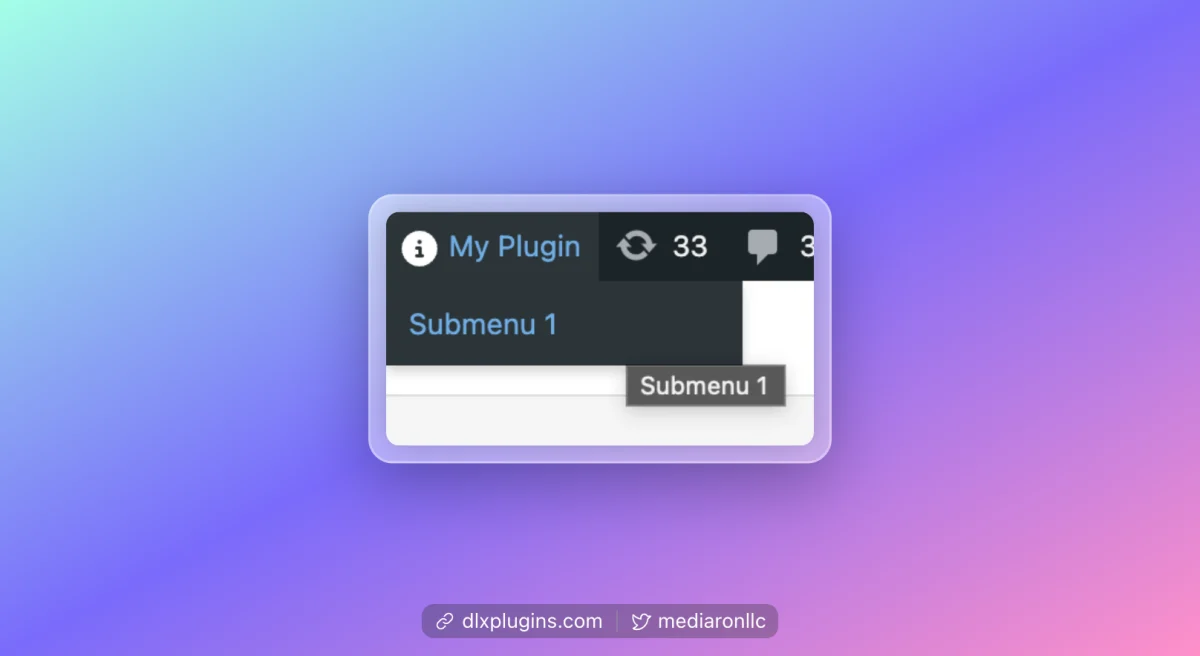
Let’s begin by creating a top-level admin bar item.
<?php

/**
 * Add a new admin bar menu item.
 *
 * @param WP_Admin_Bar $admin_bar Admin bar reference.
 */
function my_plugin_add_admin_bar_items( $admin_bar ) {
	// Run admin bar code here. Will run on both frontend and backend.
	$admin_bar->add_menu(
		array(
			'id'    => 'my-plugin-menu',
			'title' => 'My Plugin',
			'href'  => false,
			'meta'  => array(
				'class' => 'my-plugin-class',
				'title' => 'My Plugin Menu',
			),
		)
	);
}
add_action( 'admin_bar_menu', 'my_plugin_add_admin_bar_items', 50 );
Code language: PHP (php)
In this example, I’m calling method add_menu, which will add a top-level admin bar item. Let’s break down what each parameters mean and list some additional ones that are available.
id (string)
'id' => 'my-plugin-menu',Code language: PHP (php)The id argument is essentially a slug for your menu item. It should be unique, and something other people can reference.
title (string)
'title' => 'My Plugin',Code language: PHP (php)The title argument is used for setting the label in the admin bar for the menu item.
href (string or boolean) (optional)
'href' => false,Code language: PHP (php)Provide false to have a text-only menu item or set a URL the user should go to when the menu item is clicked.
parent (string) (optional)
You’re able to add menus under existing items, which is where the parent argument comes into play. You’d pass it the parent node’s id attribute value.
group (boolean) (optional)
Whether or not a node is a group. Group nodes aren’t visible unless there are children added to the node.
meta (array) (optional)
An optional array with some meta enhancements you can add like hover title, CSS classes, and even custom HTML.
Here are the array arguments you can use:
html– The html used for the node.class– The class attribute for the list item containing the link or text node.rel– The rel attribute.onclick– The onclick attribute for the link. This will only be set if the href argument is present.target– The target attribute for the link. This will only be set if the href argument is present.title– The title attribute. Will be set to the link or to a div containing a text node.tabindex– The tabindex attribute. Will be set to the link or to a div containing a text node.
Adding an icon to the top-level admin bar item
Let’s use the previous example, but instead let’s add an SVG icon next to our title.
<?php

/**
 * Add a new admin bar menu item.
 *
 * @param WP_Admin_Bar $admin_bar Admin bar reference.
 */
function my_plugin_add_admin_bar_items( $admin_bar ) {
	// Run admin bar code here. Will run on both frontend and backend.

	$svg_code = '<svg xmlns="http://www.w3.org/2000/svg" viewBox="0 0 512 512" width="16" height="16" style="vertical-align: middle; margin-right: 5px;"><path fill="#FFFFFF" d="M256 512A256 256 0 1 0 256 0a256 256 0 1 0 0 512zM216 336h24V272H216c-13.3 0-24-10.7-24-24s10.7-24 24-24h48c13.3 0 24 10.7 24 24v88h8c13.3 0 24 10.7 24 24s-10.7 24-24 24H216c-13.3 0-24-10.7-24-24s10.7-24 24-24zm40-208a32 32 0 1 1 0 64 32 32 0 1 1 0-64z"/></svg>';
	$admin_bar->add_menu(
		array(
			'id'    => 'my-plugin-menu',
			'title' => $svg_code . 'My Plugin',
			'href'  => 'https://domain.com/wp-admin/admin.php?page=my-plugin',
			'meta'  => array(
				'class' => 'my-plugin-class',
				'title' => 'My Plugin Menu',
			),
		)
	);
}
add_action( 'admin_bar_menu', 'my_plugin_add_admin_bar_items', 50 );
Code language: PHP (php)
In the above example, I’ve used an SVG from FontAwesome to demonstrate that you can use an SVG as an icon and have it show up next to your menu item.

You can also use images in place of the SVG by just including the HTML in the title argument.
Escaping the output
Since the output of the title can contain HTML, make sure to escape the output yourself.
Adding child nodes to an admin bar menu item
Let’s modify our example to add a child menu item. We’ll be using add_node for the child item, which behaves exactly the same as add_menu.
<?php

/**
 * Add a new admin bar menu item.
 *
 * @param WP_Admin_Bar $admin_bar Admin bar reference.
 */
function my_plugin_add_admin_bar_items( $admin_bar ) {
	// Run admin bar code here. Will run on both frontend and backend.

	$svg_code = '<svg xmlns="http://www.w3.org/2000/svg" viewBox="0 0 512 512" width="16" height="16" style="vertical-align: middle; margin-right: 5px;"><path fill="#FFFFFF" d="M256 512A256 256 0 1 0 256 0a256 256 0 1 0 0 512zM216 336h24V272H216c-13.3 0-24-10.7-24-24s10.7-24 24-24h48c13.3 0 24 10.7 24 24v88h8c13.3 0 24 10.7 24 24s-10.7 24-24 24H216c-13.3 0-24-10.7-24-24s10.7-24 24-24zm40-208a32 32 0 1 1 0 64 32 32 0 1 1 0-64z"/></svg>';

	// Add a new top level menu item.
	$admin_bar->add_menu(
		array(
			'id'    => 'my-plugin-menu',
			'title' => $svg_code . 'My Plugin',
			'href'  => 'https://domain.com/wp-admin/admin.php?page=my-plugin',
			'meta'  => array(
				'class' => 'my-plugin-class',
				'title' => 'My Plugin Menu',
			),
		)
	);

	// Add a submenu to the above item. add_menu is just a wrapper for add_node.
	$admin_bar->add_node(
		array(
			'parent' => 'my-plugin-menu',
			'id'     => 'my-plugin-submenu-1',
			'title'  => 'Submenu 1',
			'href'   => 'https://domain.com/wp-admin/admin.php?page=my-plugin&tab=settings',
			'meta'   => array(
				'class' => 'my-plugin-submenu-1-class',
				'title' => 'Submenu 1',
			),
		)
	);
}
add_action( 'admin_bar_menu', 'my_plugin_add_admin_bar_items', 50 );
Code language: PHP (php)
In the example above, I’m setting the parent of the node to my-plugin-menu, which is the ID of the parent.
You can go even further by adding a child node to the child onde.
<?php

/**
 * Add a new admin bar menu item.
 *
 * @param WP_Admin_Bar $admin_bar Admin bar reference.
 */
function my_plugin_add_admin_bar_items( $admin_bar ) {
	// Run admin bar code here. Will run on both frontend and backend.

	$svg_code = '<svg xmlns="http://www.w3.org/2000/svg" viewBox="0 0 512 512" width="16" height="16" style="vertical-align: middle; margin-right: 5px;"><path fill="#FFFFFF" d="M256 512A256 256 0 1 0 256 0a256 256 0 1 0 0 512zM216 336h24V272H216c-13.3 0-24-10.7-24-24s10.7-24 24-24h48c13.3 0 24 10.7 24 24v88h8c13.3 0 24 10.7 24 24s-10.7 24-24 24H216c-13.3 0-24-10.7-24-24s10.7-24 24-24zm40-208a32 32 0 1 1 0 64 32 32 0 1 1 0-64z"/></svg>';

	// Add a new top level menu item.
	$admin_bar->add_menu(
		array(
			'id'    => 'my-plugin-menu',
			'title' => $svg_code . 'My Plugin',
			'href'  => 'https://domain.com/wp-admin/admin.php?page=my-plugin',
			'meta'  => array(
				'class' => 'my-plugin-class',
				'title' => 'My Plugin Menu',
			),
		)
	);

	// Add a submenu to the above item.
	$admin_bar->add_node(
		array(
			'parent' => 'my-plugin-menu',
			'id'     => 'my-plugin-submenu-1',
			'title'  => 'Submenu 1',
			'href'   => 'https://domain.com/wp-admin/admin.php?page=my-plugin&tab=settings',
			'meta'   => array(
				'class' => 'my-plugin-submenu-1-class',
				'title' => 'Submenu 1',
			),
		)
	);

	// Add a child node to the above submenu item.
	$admin_bar->add_node(
		array(
			'parent' => 'my-plugin-submenu-1',
			'id'     => 'my-plugin-submenu-1-child',
			'title'  => 'Submenu 1 Child',
			'href'   => 'https://domain.com/wp-admin/admin.php?page=my-plugin&tab=settings',
			'meta'   => array(
				'class' => 'my-plugin-submenu-1-child-class',
				'title' => 'Submenu 1 Child',
			),
		)
	);
}
add_action( 'admin_bar_menu', 'my_plugin_add_admin_bar_items', 50 );
Code language: HTML, XML (xml)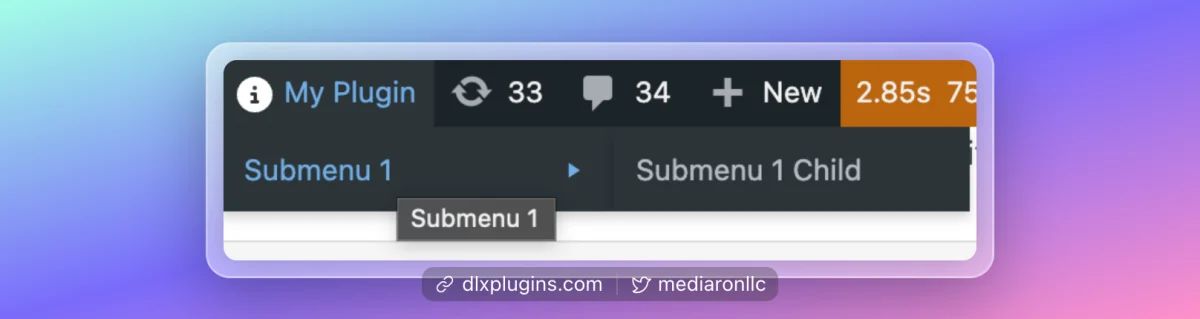
Note the use of the parent argument. By setting this argument, you can allow nesting of the menu items.
Adding nodes to existing admin bar items
Let’s pivot and demonstrate how to add a node to an existing menu item, rather than creating your own.
First, you need to know the ID of the admin bar item. I recommend opening up your Inspect Element browser tools, and using the ID that is present in the HTML LI element.
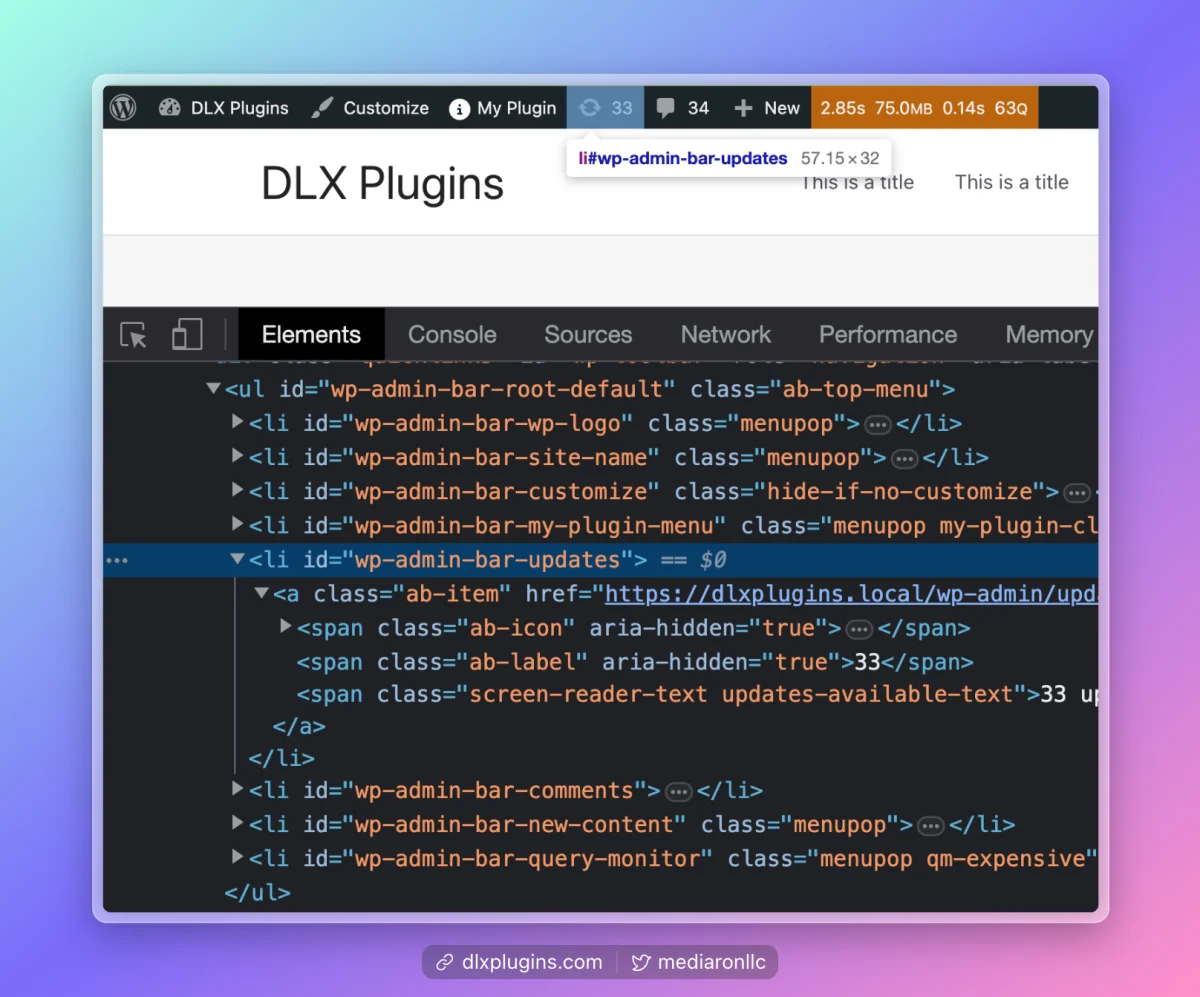
In each LI element, there are IDs, prefixed with wp-admin-bar-. In the above screenshot, you can see there is:
- wp-logo
- site-name
- customize
- updates
- comments
- new-content
- query-monitor
Let’s go ahead and add a link to the Site Health admin screen underneath the updates admin bar item.
<?php

/**
 * Add a new admin bar menu item.
 *
 * @param WP_Admin_Bar $admin_bar Admin bar reference.
 */
function my_plugin_add_admin_bar_items( $admin_bar ) {
	// Only show to admins.
	if ( ! current_user_can( 'manage_options' ) ) {
		return;
	}

	// Add site health to admin bar under updates.
	$admin_bar->add_node(
		array(
			'parent' => 'updates',
			'id'     => 'my-plugin-site-health',
			'title'  => 'Site Health',
			'href'   => esc_url( admin_url( 'site-health.php' ) ),
			'meta'   => array(
				'class' => 'my-plugin-site-health',
				'title' => 'Site Health',
			),
		)
	);
}
add_action( 'admin_bar_menu', 'my_plugin_add_admin_bar_items', 50 );
Code language: PHP (php)
In this particular case, I’m using updates as the parent and then creating the shortcut.
Removing admin bar menu items
In this example, let’s remove the comments, updates, and the WordPress logo from the admin bar. First, I need to get the IDs for each item.
After scanning the HTML elements, the IDs end up being:
- wp-logo
- comments
- updates
Here’s the resulting code:
<?php

/**
 * Add a new admin bar menu item.
 *
 * @param WP_Admin_Bar $admin_bar Admin bar reference.
 */
function my_plugin_add_admin_bar_items( $admin_bar ) {
	// Only show to admins.
	if ( ! current_user_can( 'manage_options' ) ) {
		return;
	}

	$nodes_to_remove = array(
		'wp-logo',
		'comments',
		'updates',
	);
	foreach ( $nodes_to_remove as $node_id ) {
		$admin_bar->remove_node( $node_id );
	}
}
add_action( 'admin_bar_menu', 'my_plugin_add_admin_bar_items', 100 );Code language: PHP (php)
This time I’m using method remove_node to remove the menu items.
Note the priority of the action
I set a priority of 100 so my action runs after the core menu items have been added.
Here’s the end result after removing the nodes.
Conclusion
In this tutorial, I explained the pros and cons of admin an admin bar menu. I showed how to add a top level item, adding an item to an existing parent, and how to remove menu bar items.
If you have any questions, please leave a comment below and I’ll be sure to respond.

Ronald Huereca founded DLX Plugins in 2022 with the goal of providing deluxe plugins available for download. Find out more about DLX Plugins, check out some tutorials, and check out our plugins.