
PSR (PHP Standard Recommendation) has been elusive topic for me, but ever since using it, it’s been a rather eye opening experience.
For the most part, I have been coding towards the WordPress coding standards. When I saw a PSR-4 plugin in the wild, it perplexed me as far as structure. But as I incorporated it into my projects, I suddenly started seeing some nice benefits.
Rather than diving into a standard “how I build my plugins” post, I thought I’d share how to make a simple WordPress Plugin PSR-4 while also passing WordPress Coding Standards.
Some Prerequisites
You will need the following set up and configured for this tutorial. Each of these topics are a bit complicated, so for brevity, I’m including the requirements up front. Skip to PSR-4 introduction.
You will need Composer installed
We’ll be using Composer to set up the autoloader.
Why Composer?
Composer is typically used as a PHP dependency management system. In our case, we’ll just use the autoloading portion of it.
You will need a local development environment
This tutorial assumes you have a local environment setup and is ready to go. I will be covering things from a Mac perspective. The following downloads for local environments support both a Mac and a Windows version.
I recommend (for Mac and Windows), the following local environments:
- MAMP Pro – a very easy local environment that is also very flexible and powerful.
- Local – the simplest setup for a local environment, but not as configurable as MAMP Pro.
You will need node installed
Node will be used to add any NPM scripts we’ll need. If you need to install node, you can follow the installation instructions on the Node.js website.
Node.js
Node allows you to quickly set up applications for development and distribution. It is compatible with most setups.
You will need WordPress Coding Standards Setup and Configured
Setting up WordPress Coding Standards is a rabbit hole of a task, which is why it won’t be covered here.
There are plenty of tutorials on the topic, so I’ll link to some below.
For both of the links mentioned above, you will need PHPCS (PHP Code Sniffer) installed.
Let’s begin. What is PSR-4?
PSR-4 is an opinionated autoloading technique. Since the folder structure is predictable, you no longer have to guess when it comes to using your various classes or interacting with others using the same standard.
PSR-4 Definition
[PSR-4] describes a specification for autoloading classes from file paths. It is fully interoperable, and can be used in addition to any other autoloading specification, including PSR-0. This PSR also describes where to place files that will be auto loaded according to the specification.
In the example below, I have a namespace of MediaRonLLC\QuotesDLX. I can reference a class file, which will look in an Admin folder for a file named Plugin_License.php.
namespace MediaRonLLC\QuotesDLX;

use MediaRonLLC\QuotesDLX\Admin\Plugin_License as License;Code language: PHP (php)
Here’s an example setup with the php directory containing most of your backend logic.
.
└── quotes-dlx.php/
    └── php/
        └── Admin/
            └── Plugin_License.phpCode language: AsciiDoc (asciidoc)
The class structure for Plugin_License.php starts as:
<?php
/**
 * Perform license actions.
 *
 * @package quotes-dlx
 */

namespace MediaRonLLC\QuotesDLX\Admin;

use MediaRonLLC\QuotesDLX\Options_License as Options;

// don't load directly.
if ( ! defined( 'ABSPATH' ) ) {
	die();
}

/**
 * Class License Check.
 */
class Plugin_License {Code language: PHP (php)
Since the folder and class structure are the same, there is no longer any guesswork as to what class or file you are interacting with.
Let’s get started with how to setup PSR-4 for a WordPress plugin.
Initializing the Plugin
In the examples in this tutorial I’m using a plugin I’ve named Power Blocks. In your local development environment, create a plugin folder named power-blocks with a base file named power-blocks.php.
.
└── power-blocks/
    └── power-blocks.phpCode language: AsciiDoc (asciidoc)
Within power-blocks.php, we can set the plugin header:
<?php
/**
 * Plugin Name:       Power Blocks (sample plugin)
 * Plugin URI:        https://github.com/DLXPlugins/power-blocks
 * Description:       A plugin demonstrating a PSR-4 structure.
 * Version:           1.0.0
 * Requires at least: 5.9
 * Requires PHP:      7.2
 * Author:            DLX Plugins
 * Author URI:        https://dlxplugins.com
 * License:           GPL v2 or later
 * License URI:       https://www.gnu.org/licenses/gpl-2.0.html
 * Text Domain:       power-blocks
 * Domain Path:       /languages
 *
 * @package PowerBlocks
 */Code language: PHP (php)
Follow along with GitHub
A GitHub repository has been set up for the sample plugin.
Finally, let’s set up a namespace to use for the plugin.
<?php
/**
 * Plugin Name:       Power Blocks (sample plugin)
 * Plugin URI:        https://github.com/DLXPlugins/power-block
 * Description:       A plugin demonstrating a PSR-4 structure.
 * Version:           1.0.0
 * Requires at least: 5.9
 * Requires PHP:      7.2
 * Author:            DLX Plugins
 * Author URI:        https://dlxplugins.com
 * License:           GPL v2 or later
 * License URI:       https://www.gnu.org/licenses/gpl-2.0.html
 * Text Domain:       power-blocks
 * Domain Path:       /languages
 *
 * @package PowerBlocks
 */

namespace DLXPlugins\PowerBlocks;Code language: PHP (php)
We now have a working plugin that can be activated. Let’s set up the autoloader next.
Setting up Composer
I have to admit that setting up Composer is not a straightforward process. But Composer is by far the easiest way to ensure your plugin has a PSR-4 structure.
Composer has an autoloader built-in, which will save you from a ton of require_once calls.
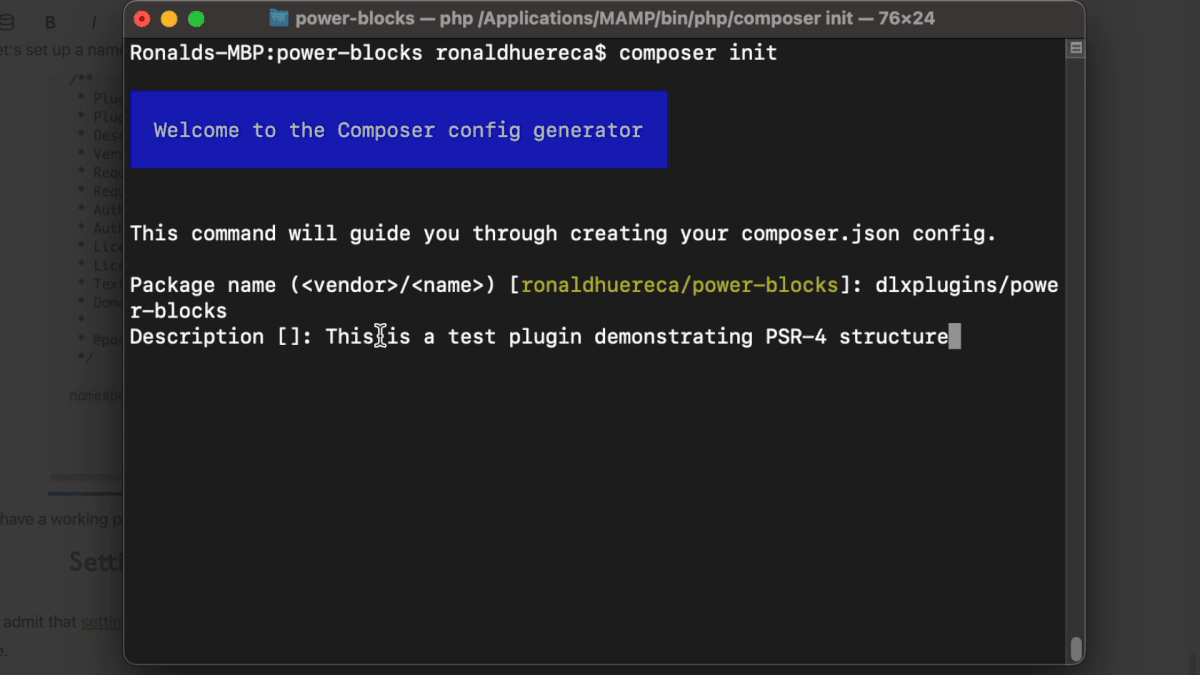
To start, navigate to your plugin directory and type in: composer init.

After running composer init, you will receive several prompts to set up your project. Composer does its best to guess what namespace you’d like to use, but in this case I want to change it to dlxplugins/power-blocks.

Set the vendor/name carefully.
The vendor/name should act like a namespace. If your PHP namespace is `DLXPlugins\PowerBlocks`, then the vendor/name should be `dlxplugins\powerblocks` for the autoloader to work.
Once you press enter, you will be asked to enter a description.

From there, you can just go through the rest of the wizard by answering a few questions, and then a composer.json file will be created in the plugin directory.
The resulting composer.json file will look similar to this:
{
    "name": "dlxplugins/powerblocks",
    "description": "This is a test plugin demonstrating PSR-4 structure",
    "authors": [
        {
            "name": "Ronald Huereca",
            "email": "ronald@mediaron.com"
        }
    ],
    "require": {}
}
Code language: JSON / JSON with Comments (json)
Adding Autoloading to Composer
With composer initiated, we can now open up the generated composer.json file in a text editor to set up autoloading.
Let’s modify our plugin’s composer.json to have its files moved to a lib folder instead of a vendor directory. Since most composer dependencies use the vendor directory, it’s hard to exclude composer dependencies from a build. Pushing what’s needed to a lib folder allows us to include the autoloader with the plugin’s release.
{
	"name": "dlxplugins/powerblocks",
	"description": "This is a test plugin demonstrating PSR-4 structure",
	"authors": [
		{
			"name": "Ronald Huereca",
			"email": "ronald@mediaron.com"
		}
	],
	"config": {
		"vendor-dir": "lib"
	}
}
Code language: JSON / JSON with Comments (json)
And finally we’ll tell composer that the structure is PSR-4 and the autoloader should look for files in a php directory.
{
	"name": "dlxplugins/powerblocks",
	"description": "This is a test plugin demonstrating PSR-4 structure",
	"authors": [
		{
			"name": "Ronald Huereca",
			"email": "ronald@mediaron.com"
		}
	],
	"config": {
		"vendor-dir": "lib"
	},
	"autoload": {
		"psr-4": {
			"DLXPlugins\\PowerBlocks\\": "php/"
		}
	}
}

Code language: JSON / JSON with Comments (json)
The php Base Directory
The “php” base directory for your files can be named whatever fits your project best. Some plugin authors opt for an “includes” folder instead, for example.
You’ll notice that there’s a namespace of DLXPlugins\PowerBlocks for the autoloader. This will be the PHP namespace used in the plugin.
Armed with the autoloader in composer.json, we can run composer install from the project’s directory.
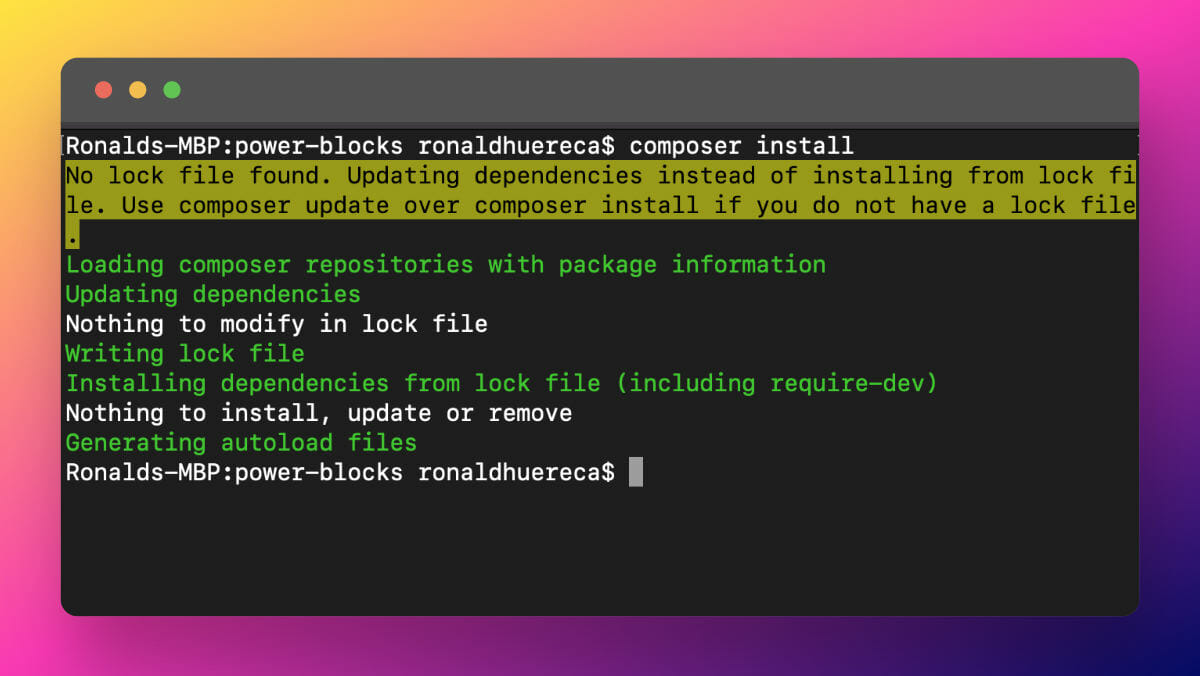
The plugin should now have a directory structure as follows:
.
└── power-blocks/
    ├── composer.json
    ├── power-blocks.php
    └── lib/
        ├── autoload.php
        └── composerCode language: AsciiDoc (asciidoc)
Setting up the autoloader in the plugin
Armed with a composer autoloader, we can simply reference our autoloader in our plugin file.
<?php
/**
 * Plugin Name:       Power Blocks (sample plugin)
 * Plugin URI:        https://github.com/DLXPlugins/power-blocks
 * Description:       A plugin demonstrating a PSR-4 structure.
 * Version:           1.0.0
 * Requires at least: 5.9
 * Requires PHP:      7.2
 * Author:            DLX Plugins
 * Author URI:        https://dlxplugins.com
 * License:           GPL v2 or later
 * License URI:       https://www.gnu.org/licenses/gpl-2.0.html
 * Text Domain:       power-blocks
 * Domain Path:       /languages
 *
 * @package PowerBlocks
 */

namespace DLXPlugins\PowerBlocks;

define( 'POWER_BLOCKS_VERSION', '1.0.0' );
define( 'POWER_BLOCKS_FILE', __FILE__ );

if ( file_exists( __DIR__ . '/lib/autoload.php' ) ) {
	require_once __DIR__ . '/lib/autoload.php';
}Code language: PHP (php)
Finally, we can create a base class so that you can start with the plugin initialization class.
/* [... plugin heading code and autoloader ...] */

/**
 * PowerBlocks class.
 */
class PowerBlocks {

	/**
	 * Holds the class instance.
	 *
	 * @var PowerBlocks $instance
	 */
	private static $instance = null;

	/**
	 * Return an instance of the class
	 *
	 * Return an instance of the PowerBlocks Class.
	 *
	 * @since 1.0.0
	 *
	 * @return PowerBlocks class instance.
	 */
	public static function get_instance() {
		if ( null === self::$instance ) {
			self::$instance = new self();
		}
		return self::$instance;
	}

	/**
	 * Class initializer.
	 */
	public function plugins_loaded() {
		load_plugin_textdomain(
			'power-blocks',
			false,
			basename( dirname( __FILE__ ) ) . '/languages'
		);

		// Run plugin setup code here.

		add_action( 'init', array( $this, 'init' ) );
	}

	/**
	 * Init all the things.
	 */
	public function init() {
		// Run plugin init code here.
	}
}

add_action(
	'plugins_loaded',
	function() {
		$power_blocks = PowerBlocks::get_instance();
		$power_blocks->plugins_loaded();
	}
);
Code language: PHP (php)
We’ll go over how to take advantage of the autoloader shortly, but first let’s tackle an error you’re probably already seeing. WordPress coding standards do not like how we named and packaged up our main plugin file.
Passing WordPress coding standards

As seen in the above screenshot, WordPress coding standards do not like the PSR-4 structure we have setup. Let’s tell WordPress to ignore this requirement.
With PHPCS, you can enable custom rules per project. This involves creating a phpcs.xml.dist file and adding or subtracting any rules.
In our case, we want to hide the error that the filenames are wrong. We’ll add in a simple rule to the file to tell it to ignore the filename standard.
<rule ref="WordPress-Core">
	<exclude name="WordPress.Files.FileName" />
</rule>Code language: HTML, XML (xml)
A full version of phpcs.xml.dist is shown below:
<?xml version="1.0"?>
<ruleset name="Power Block Standards">
	<arg name="extensions" value="php" />
	<arg name="colors" />
	<arg value="s" /><!-- Show sniff codes in all reports -->

	<rule ref="WordPress-Core">
		<exclude name="WordPress.Files.FileName" />
	</rule>

	<rule ref="WordPress-Docs"></rule>

	<config name="testVersion" value="6.0-" />
	<file>.</file>

	<exclude-pattern>/node_modules/</exclude-pattern>
	<exclude-pattern>/vendor/</exclude-pattern>
	<exclude-pattern>/lib/</exclude-pattern>
</ruleset>Code language: HTML, XML (xml)
If you refresh your IDE (I use VS Code), the errors should be gone.
We now have a folder structure like this:
.
└── power-blocks/
    ├── composer.json
    ├── phpcs.xml.dist
    ├── power-blocks.php
    └── lib/
        ├── autoload.php
        └── composerCode language: AsciiDoc (asciidoc)
Autoloading in action: creating a simple admin panel
Let’s go ahead and create a simple admin panel in order to demonstrate how the composer autoloader works. If you want to skip straight to the code, it is available on GitHub.
A note about the plugin file structure
The following structure is simply to demonstrate how to interact with the autoloading mechanism through examples.
Creating the structure
Let’s start off small. Let’s create an “Admin” folder inside our base (php) folder.
.
└── power-blocks/
    ├── composer.json
    ├── phpcs.xml.dist
    ├── power-blocks.php
    ├── lib/
    │   ├── autoload.php
    │   └── composer
    └── php/
        └── Admin/
            └── ...[files here]Code language: AsciiDoc (asciidoc)
Let’s also create a Functions.php file and place it in the root php folder. This will be used for common functions that need to run throughout the plugin.
.
└── power-blocks/
    ├── composer.json
    ├── phpcs.xml.dist
    ├── power-blocks.php
    ├── lib/
    │   ├── autoload.php
    │   └── composer
    └── php/
        ├── Admin/
        │   └── ...[files here]
        └── Functions.php
In the Admin folder, let’s also create three files called Register_Menu.php, Settings_Links.php, and Settings.php.
.
└── power-blocks/
    ├── composer.json
    ├── phpcs.xml.dist
    ├── power-blocks.php
    ├── lib/
    │   ├── autoload.php
    │   └── composer
    └── php/
        ├── Admin/
        │   ├── Register_Menu.php
        │   ├── Settings_Links.php
        │   └── Settings.php
└── Functions.phpCode language: AsciiDoc (asciidoc)Register_Menu.php– For initializing the admin panel menuSettings_Links.php– For linking to the admin panel from the Plugins screenSettings.php– For outputting our admin panel settings
And with that, our structure is complete.
Adding common helpers to Functions.php
Within Functions.php, I’m going to add three helper methods for retrieving information about the plugin:
<?php
/**
 * Helper functions for the plugin.
 *
 * @package PowerBlocks
 */

namespace DLXPlugins\PowerBlocks;

/**
 * Class Functions
 */
class Functions {

	/**
	 * Return the plugin slug.
	 *
	 * @return string plugin slug.
	 */
	public static function get_plugin_slug() {
		return dirname( plugin_basename( POWER_BLOCKS_FILE ) );
	}

	/**
	 * Return the basefile for the plugin.
	 *
	 * @return string base file for the plugin.
	 */
	public static function get_plugin_file() {
		return plugin_basename( POWER_BLOCKS_FILE );
	}

	/**
	 * Return the version for the plugin.
	 *
	 * @return float version for the plugin.
	 */
	public static function get_plugin_version() {
		return POWER_BLOCKS_VERSION;
	}
}Code language: PHP (php)
Let’s set this file aside and move onto registering the admin menu item.
Setting up menu registration
The next file is the Register_Menu.php in the Admin folder.
<?php
/**
 * Initialize the admin menu.
 *
 * @package PowerBlocks
 */

namespace DLXPlugins\PowerBlocks\Admin;

use DLXPlugins\PowerBlocks\Functions as Functions;

/**
 * Create the admin menu.
 */
class Register_Menu {

	/**
	 * Main class runner.
	 */
	public static function run() {
		add_action( 'admin_menu', array( static::class, 'init_menu' ) );
	}

	/**
	 * Register the plugin menu.
	 */
	public static function init_menu() {

		add_options_page(
			__( 'Power Blocks', 'power-blocks' ),
			__( 'Power Blocks', 'power-blocks' ),
			'manage_options',
			Functions::get_plugin_slug(),
			array( '\DLXPlugins\PowerBlocks\Admin\Settings', 'settings_page' ),
			100
		);
	}
}
?>Code language: HTML, XML (xml)
Let’s go over the highlighted portions of the code.
Usually when trying to get access to methods of another class, you have to make sure that class file is included as a require_once or similar.
use DLXPlugins\PowerBlocks\Functions as Functions;Code language: PHP (php)With autoloading, we can reference the Functions.php file via its namespace and the autoloader will take care of loading the right file (assuming the path is correct).
The next portion will hook into the WordPress action admin_menu and reference a static method as a callback.
add_action( 'admin_menu', array( static::class, 'init_menu' ) );Code language: PHP (php)The static::class placeholder tells WordPress to look in the same class for the callback method, which is the init_menu callback.
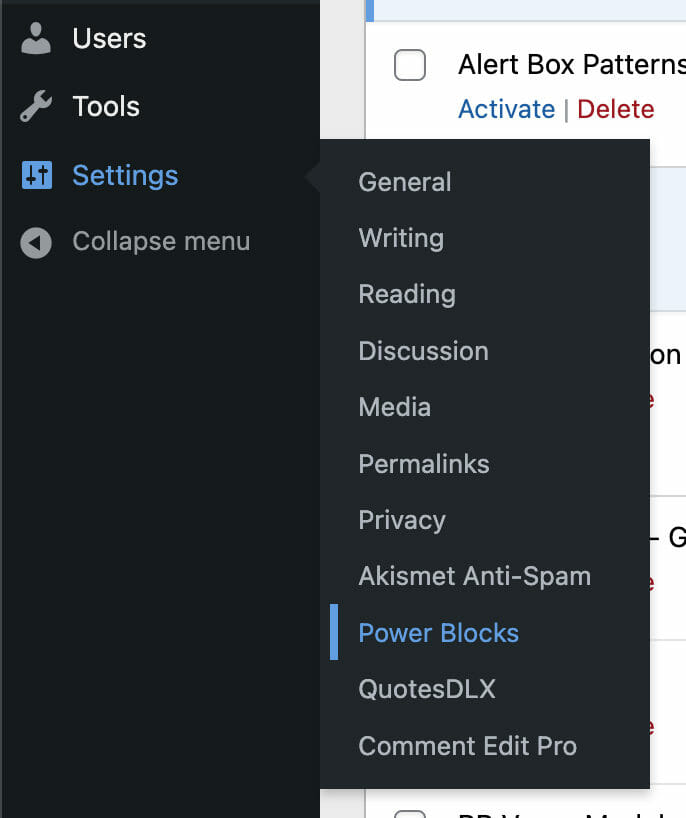
The last step in this section is to create an options menu, which will live under the Settings menu in the WordPress admin area.
Since Functions.php has already been included, we can call its static methods.
Functions::get_plugin_slug()Code language: PHP (php)Another way of writing the above would be:
\DLXPlugins\PowerBlocks\Functions::get_plugin_slug()Code language: PHP (php)When creating the menu, there must be a valid callback, which will be a method named settings_page inside a Settings class.
array( '\DLXPlugins\PowerBlocks\Admin\Settings', 'settings_page' )Code language: PHP (php)The long namespace settings are due to how WordPress handles callbacks, so the full path must be included (no shortcuts for now, I’m afraid).
One thing to take note is that even though the callback is pretty long, you can take one look at it and know exactly which file is being called and what method within that file is being called (in our case /php/Admin/Settings.php).
Lastly, we need to initialize this menu from the main plugin file.
/**
 * Class initializer.
 */
public function plugins_loaded() {
	load_plugin_textdomain(
		'power-blocks',
		false,
		basename( dirname( __FILE__ ) ) . '/languages'
	);

	// Register the admin menu.
	Admin\Register_Menu::run();

	// Run plugin setup code here.

	add_action( 'init', array( $this, 'init' ) );
}
Code language: PHP (php)
The above syntax simply states, to the autoloader, to find a file called Register_Menu.php in the Admin folder and call a static method named run.
If all is well, you’ll see a placeholder for our admin menu item.
Setting up admin menu output
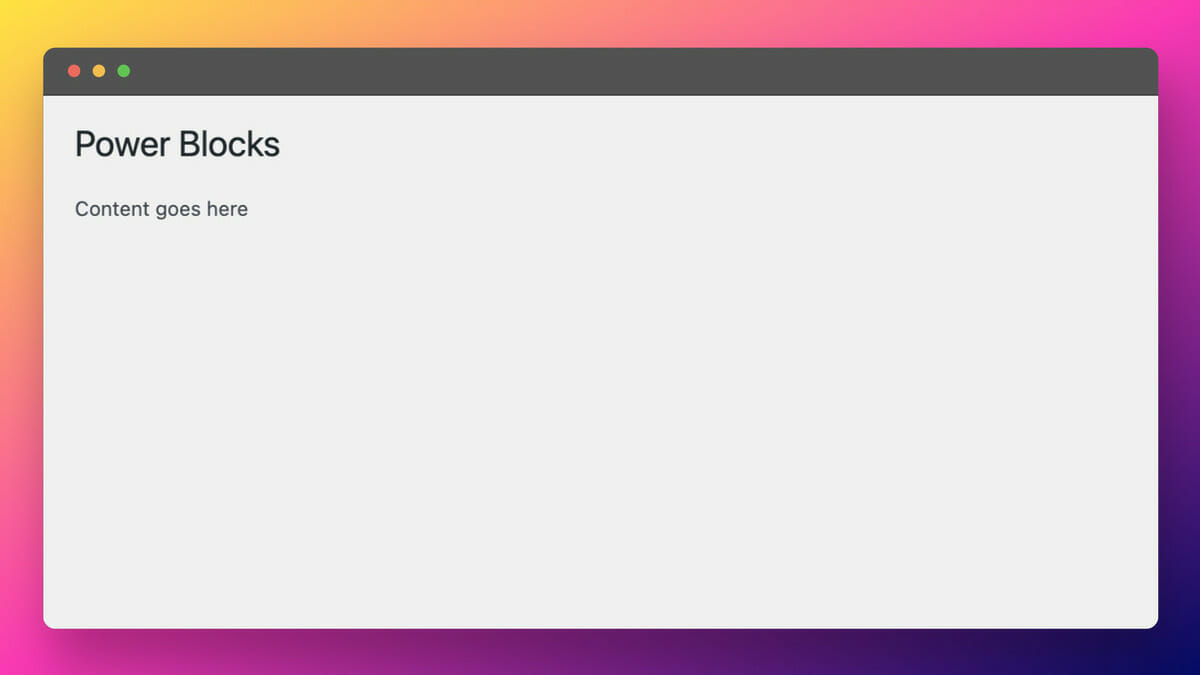
We’re now ready to output something to the screen when someone clicks on our admin menu item. Let’s fill in settings.php.
<?php
/**
 * Initialize and display admin panel output.
 *
 * @package PowerBlocks
 */

namespace DLXPlugins\PowerBlocks\Admin;

/**
 * Class Functions
 */
class Settings {

	/**
	 * Registers and outputs placeholder for settings.
	 *
	 * @since 1.0.0
	 */
	public static function settings_page() {
		?>
		<div class="wrap power-blocks-plugin">
			<h2>Power Blocks</h2>
			<p>Content goes here</p>
		</div>
		<?php
	}
}
Code language: PHP (php)
We now have a valid callback. Clicking on the menu item will now display some text to the screen.
Setting up plugin setting links
In this final section, we’ll just add some items to the settings links when someone views our plugin in the plugins screen in the WordPress admin area.
Let’s fill in Settings_Links.php:
<?php
/**
 * Add settings links to the plugin screen.
 *
 * @package PowerBlocks
 */

namespace DLXPlugins\PowerBlocks\Admin;

use DLXPlugins\PowerBlocks\Functions as Functions;

/**
 * Add settings links to the plugin screen.
 */
class Settings_Links {

	/**
	 * Main class runner.
	 */
	public static function run() {
		add_filter(
			'plugin_action_links_' . Functions::get_plugin_file(),
			array( static::class, 'add_settings_link' )
		);
	}

	/**
	 * Add a settings link to the plugin's options.
	 *
	 * Add a settings link on the WordPress plugin's page.
	 *
	 * @since 1.0.0
	 * @access public
	 *
	 * @see run
	 *
	 * @param array $links Array of plugin options.
	 * @return array $links Array of plugin options
	 */
	public static function add_settings_link( $links ) {
		$settings_url = admin_url( 'options-general.php?page=power-blocks' );
		$docs_url     = 'https://docs.dlxplugins.com/';
		$site_url     = 'https://dlxplugins.com';
		if ( current_user_can( 'manage_options' ) ) {
			$options_link = sprintf( '<a href="%s">%s</a>', esc_url( $settings_url ), _x( 'Settings', 'Options link', 'power-blocks' ) );
			array_unshift( $links, $options_link );
			$docs_link = sprintf( '<a href="%s">%s</a>', esc_url( $docs_url ), _x( 'Docs', 'Plugin documentation', 'power-blocks' ) );
			$site_link = sprintf( '<a href="%s">%s</a>', esc_url( $site_url ), _x( 'DLXPlugins', 'Plugin site', 'power-blocks' ) );
			$links[]   = $docs_link;
			$links[]   = $site_link;
		}
		return $links;
	}
}
Code language: PHP (php)
Once again we are referencing the Functions file and adding links to our plugin only.
We’ll have to wire this up in the main plugin file as well.
/**
 * Class initializer.
 */
public function plugins_loaded() {
	load_plugin_textdomain(
		'power-blocks',
		false,
		basename( dirname( __FILE__ ) ) . '/languages'
	);

	// Register the admin menu.
	Admin\Register_Menu::run();
	Admin\Settings_Links::run();

	// Run plugin setup code here.

	add_action( 'init', array( $this, 'init' ) );
}
Code language: PHP (php)
The output results is three links added to the plugin row:

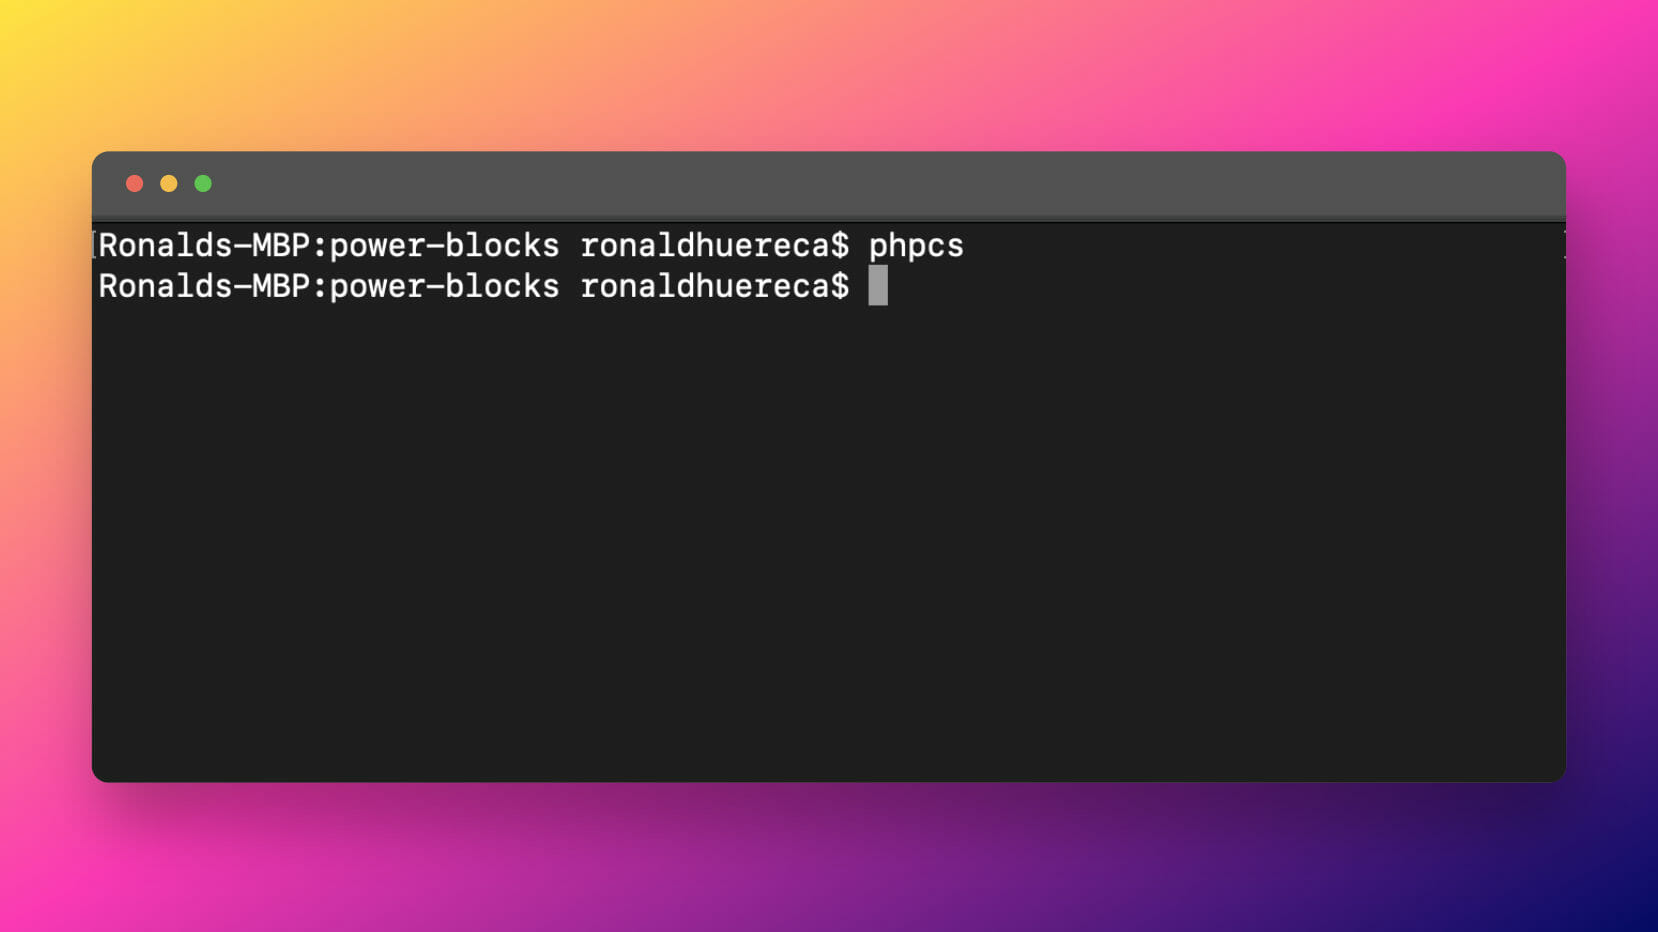
A quick WordPress coding standards test…
If all is well, we should receive passing marks for the coding standards.
Conclusion
The code in this article is on GitHub
Setting up PSR-4 in a WordPress plugin can be straightforward, but interacting with the files and structure via WordPress can be a bit of trial-and-error.
I’ve provided several examples of PSR-4 in use by setting up a basic WordPress admin panel.
If you have any comments or questions, please do leave a comment below. Thank you so much for reading.

Ronald Huereca founded DLX Plugins in 2022 with the goal of providing deluxe plugins available for download. Find out more about DLX Plugins, check out some tutorials, and check out our plugins.